
Introduction
So, you’ve gotten your hands on a Microsoft HoloLens 2 and are excited to start developing your first Augmented Reality application. You sit down at the computer, put on the headset, and… wait, how exactly does one develop for the HoloLens? If you’ve found yourself in this situation, or just need a quick refresher, you’re in the right place. In this “Hello World” tutorial, we’ll cover a step-by-step to get your first application on the HoloLens.
Step 1: Get the Tools
Before we can begin developing, we need to get our development environment setup. For the HoloLens, application development is commonly done using a combination of game-engine software and a scripting IDE (interactive development environment). Game-engines provide an easy environment in which to create and manipulate 3D objects, a necessity when wanting to render holograms on the HoloLens. Then, your scripting IDE will allow for comprehensive control of these holograms as well as provide the framework to package and deploy your app to the HoloLens.
As far as game-engine software goes, there are two common options for HoloLens development, Unity and Unreal Engine. Both are supremely capable game development suites, and both can easily be adapted to produce apps for the HoloLens. So there really isn’t a right/wrong choice when choosing which engine to use. However, in this tutorial, we’ll be using Unity. The Unity game-engine, in my opinion, is a little more mature in its integration with the HoloLens and is therefore and good choice for beginners.
For a scripting IDE, there is really only one option, Microsoft’s Visual Studio. The Visual Studio IDE gives you robust control over the packaging and deployment of your app to the HoloLens and integrates nicely with Unity.
Install Unity
To install Unity, one should first download and install Unity Hub (at the time of writing, available at (https://unity.com/products/unity-engine). Unity Hub serves as a place to manage all of your Unity projects and versions of the Unity Editor software. Unity may require you to create a free account in order to install the software. Once downloaded and installed, Unity Hub should look similar to this:
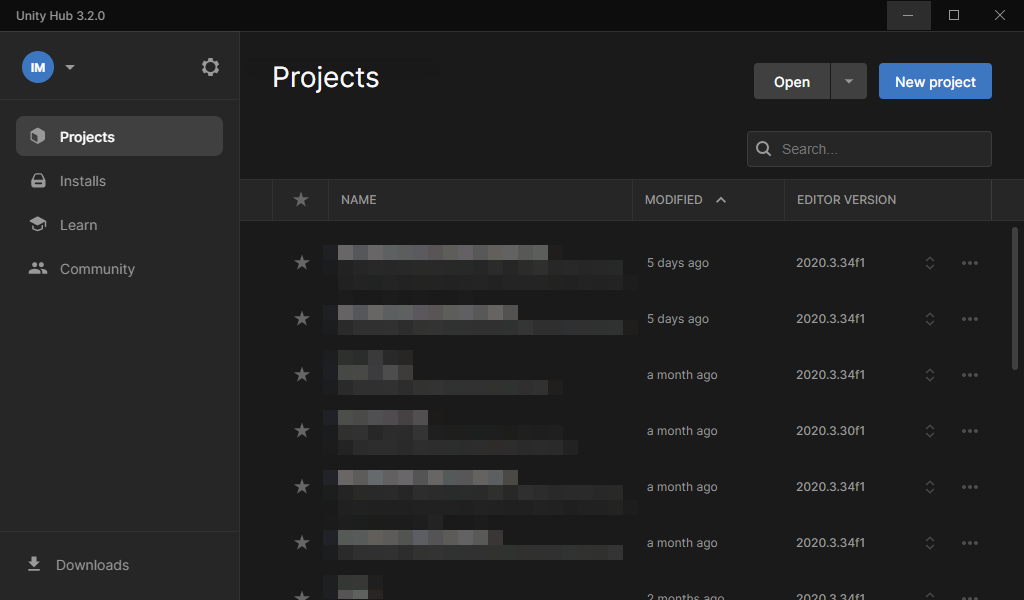
We need to install the software that you’ll actually be using to make your application, known as the Unity Editor. To do so, click on the Installs tab of the Unity Hub:

Here, you will see all currently installed versions of the Unity Editor (You’ll have nothing installed if this is your first time using Unity):

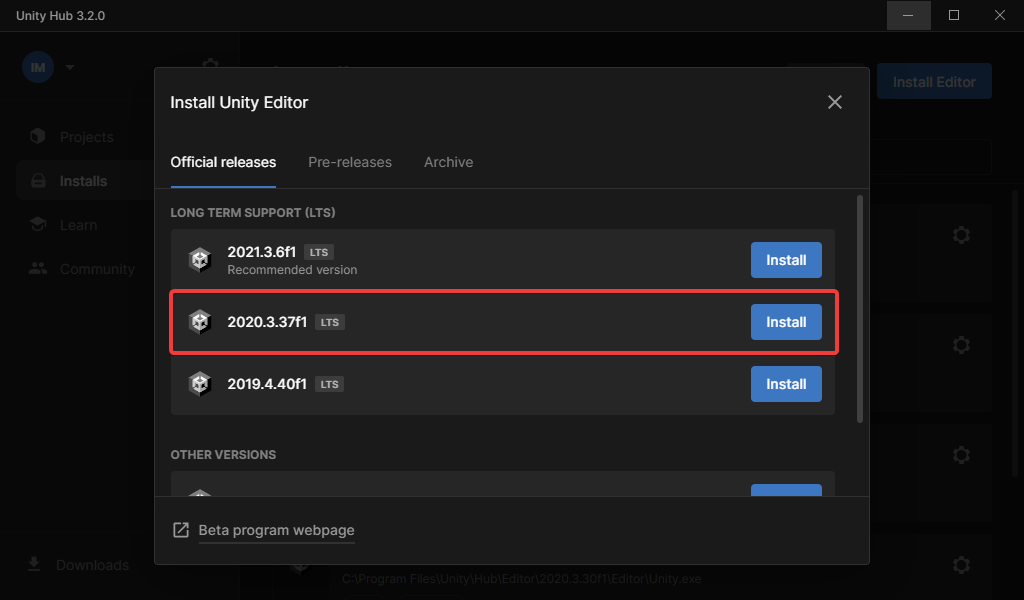
To install a version of the Unity Editor, click the Install Editor button in the top right. This will bring up a menu prompting you to indicate which version of the Unity Editor you would like to install. By default, Unity offers the latest LTS (long term support) versions of either the 2019, 2020, or 2021 variants of the Unity Editor. For this tutorial, we will install version 2020.3.37f1. My reasoning for picking this version is mainly that I have a lot of experience with the 2020.3 variant and am confident in its integration with the HoloLens. However, most versions that are 2019 or higher should work. Also note that any other version of the Unity Editor may be installed by clicking the Archive tab. For now, go ahead and click the Install button for version 2020.3.37f1:
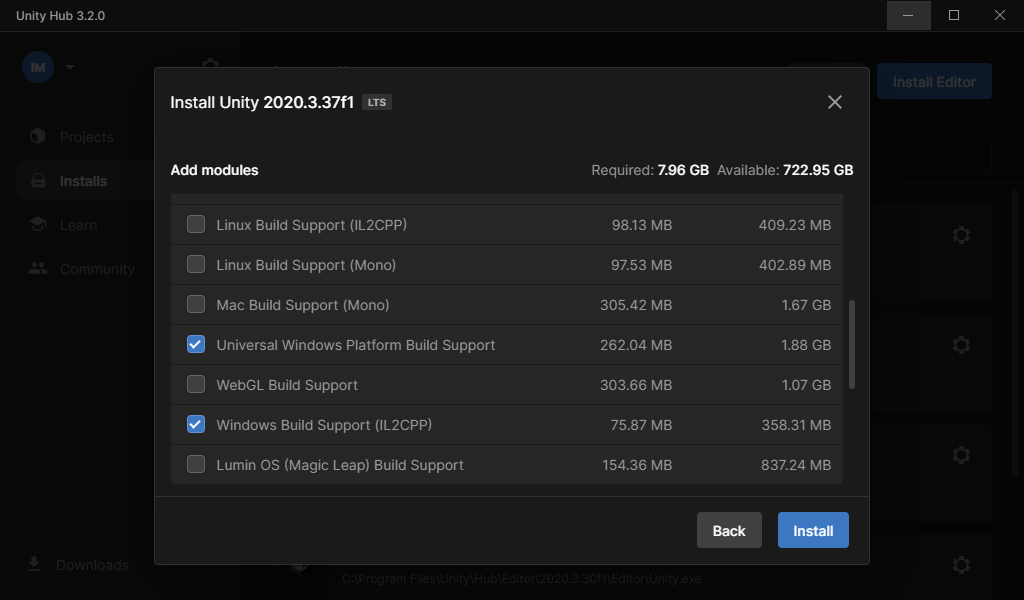
Before installing, Unity Hub will ask you what platforms you want supported in the Unity Editor. HoloLens applications are typically Universal Windows Platform (UWP) apps. Therefore, scroll down and select both the Universal Windows Platform Build Support and the Windows Build Support (IL2CPP):
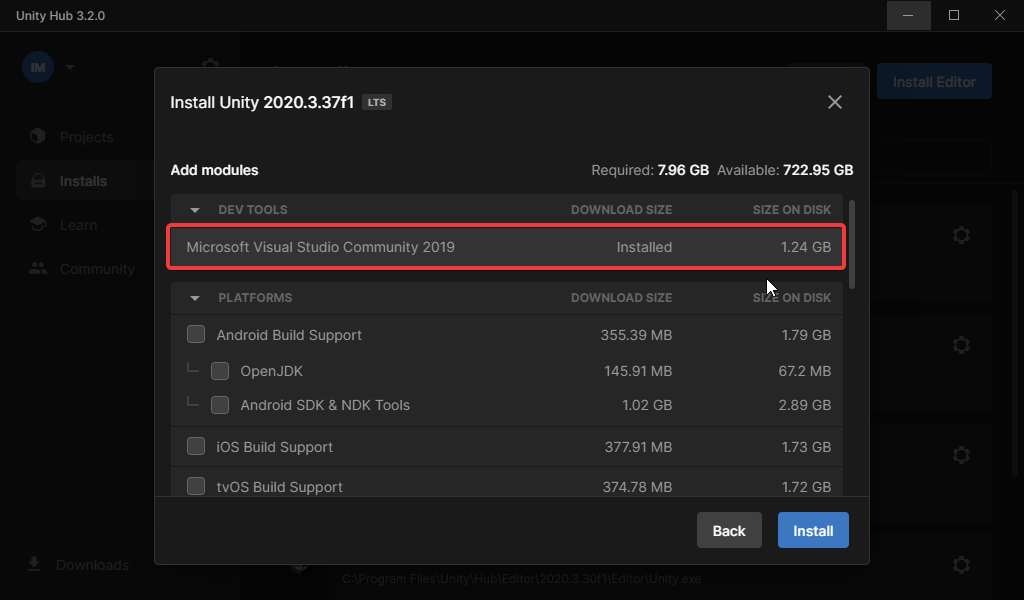
Optionally, if you plan on using Unity for development on other devices, you can install as many platforms as you wish. Also, you can install Visual Studio here if you wish, however, I’d recommend following the instructions in the next section to download Visual Studio to ensure you’re getting the latest version. To install Visual Studio here, click the Microsoft Visual Studio Community 2019 checkbox under the Dev Tools sections (I already have it installed):
Click Install in the bottom right. Note, this process may take some time and Windows may prompt you for Admin approval.
Install Visual Studio
If you didn’t install Visual Studio while installing the Unity Editor or want a different version of Visual Studio, you’ll need to explicitly download it. As far as developing for the HoloLens, there isn’t a substantial difference between the 2019 and 2022 versions of Visual Studio, but for the sake of using the latest tools, we’ll use the 2022 version here. Visit the downloads page of the Visual Studio website (at the time of writing, available at https://visualstudio.microsoft.com/) and download the free Community Edition of Visual Studio 2022.
Once the Visual Studio installer has launched, it will prompt us to select which workloads we want to install. For HoloLens development using Unity, we must install the following workloads:
- .NET desktop development
- Desktop development with C++
- Universal Windows Platform development
- Game development with Unity

Within the Universal Widows Platform development workload we need to make sure that the following additional components are marked for installation:
- Windows 10 SDK version 10.0.19041.0 (*See Below)
- C++ (v142) Universal Windows Platform tools
- USB Device Connectivity

*Note: This tutorial was written for a machine running Windows 10. If you are on Windows 11, you may be able to use a version of the Windows 11 SDK, however, I have not tested this and cannot confirm it will work.
After confirming you have all the proper workloads and components, click either Install while downloading or Install to continue.
Get the Mixed Reality Feature Tool
Microsoft’s Mixed Reality Feature Tool provides a centralized place to import relevant mixed reality packages into your Unity project. There are many useful mixed reality packages that you may find yourself using eventually. However, for this beginner tutorial, we are mostly concerned with Microsoft’s Mixed Reality Toolkit (MRTK) and the Mixed Reality OpenXR plugin. MRTK is a collection of components and features that can accelerate the development of mixed reality applications. OpenXR is an open API standard to access a wide array of virtual and augmented reality devices, including the HoloLens.
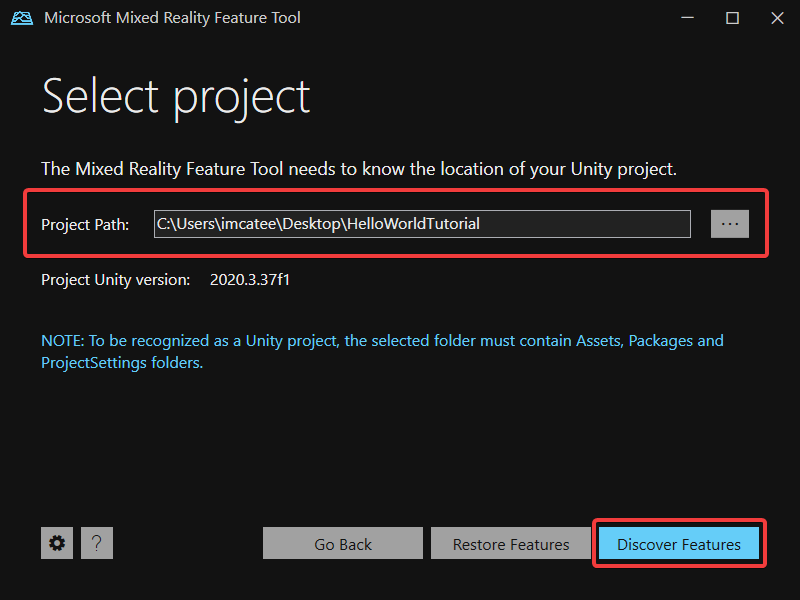
Download the Mixed Reality Feature Tool from Microsoft (at the time of writing, available at https://docs.microsoft.com/en-us/windows/mixed-reality/develop/unity/welcome-to-mr-feature-tool). Note, the Mixed Reality Feature Tool will download as .zip folder. Extract the folder contents and launch the tool via the MixedRealityFeatureTool.exe file:

Confirm HoloLens is in Development Mode
In order to deploy outside apps (such as this Hello World Tutorial), your HoloLens needs to be in developer mode with some associated settings properly configured. On your HoloLens, open the Settings app and navigate to Update & Security > For developers, and configure the settings as follows:
- Use Developer Features – On
- Device Discovery – On
- Device Portal – On


Step 2: Setup the Unity Project
Now that we have all the necessary tools downloaded, we are finally ready to get into Unity and setup the project. This section is very important to follow exactly, as small errors in the setup of the project can lead to big headaches down the road.
Create the Unity Project
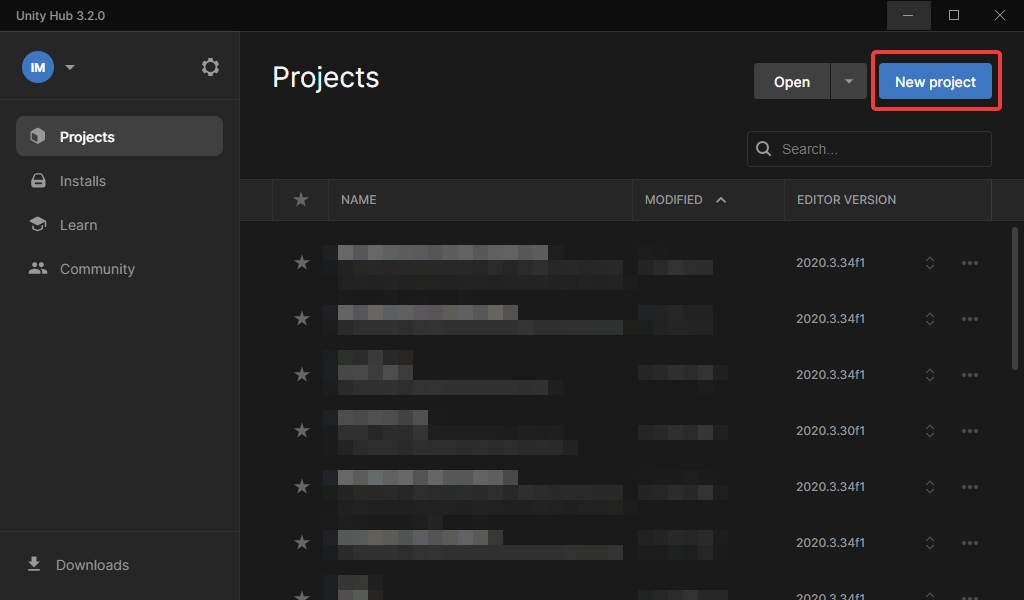
Open Unity Hub and click New Project in the upper right:
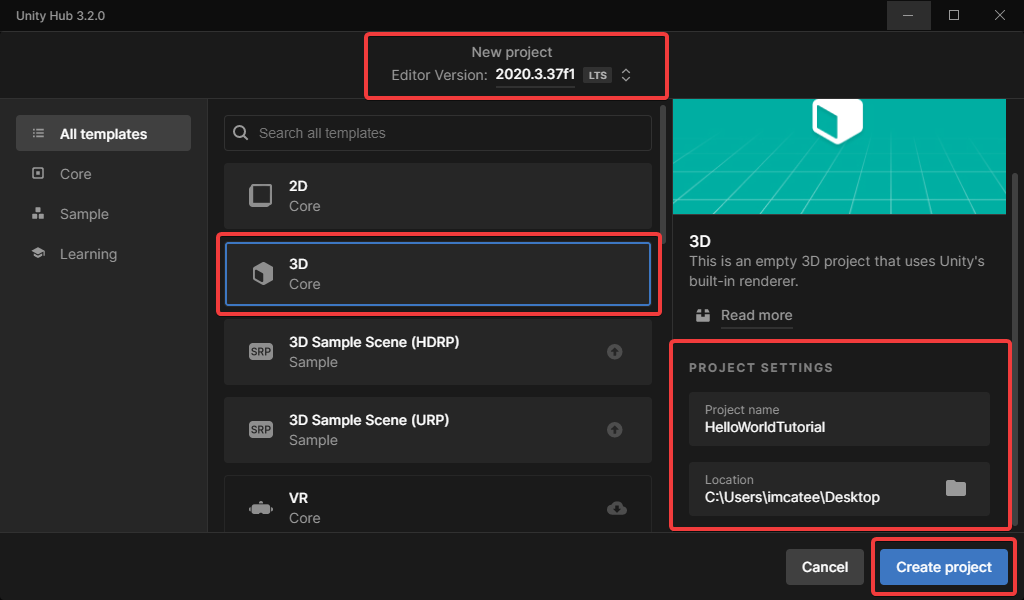
A window will prompt you to configure some basic properties of your new project. Here, we want to ensure that the Editor Version at the top of the window is set to the version we downloaded: 2020.3.37f1. Next you will see a list of new project templates that Unity provides. For most HoloLens projects, we want to select the 3D Core template (a basic blank 3D project). Lastly, give your project a suitable name, such as “HelloWorldTutorial” , specify its save path, and click Create Project:
Switch the Build Platform
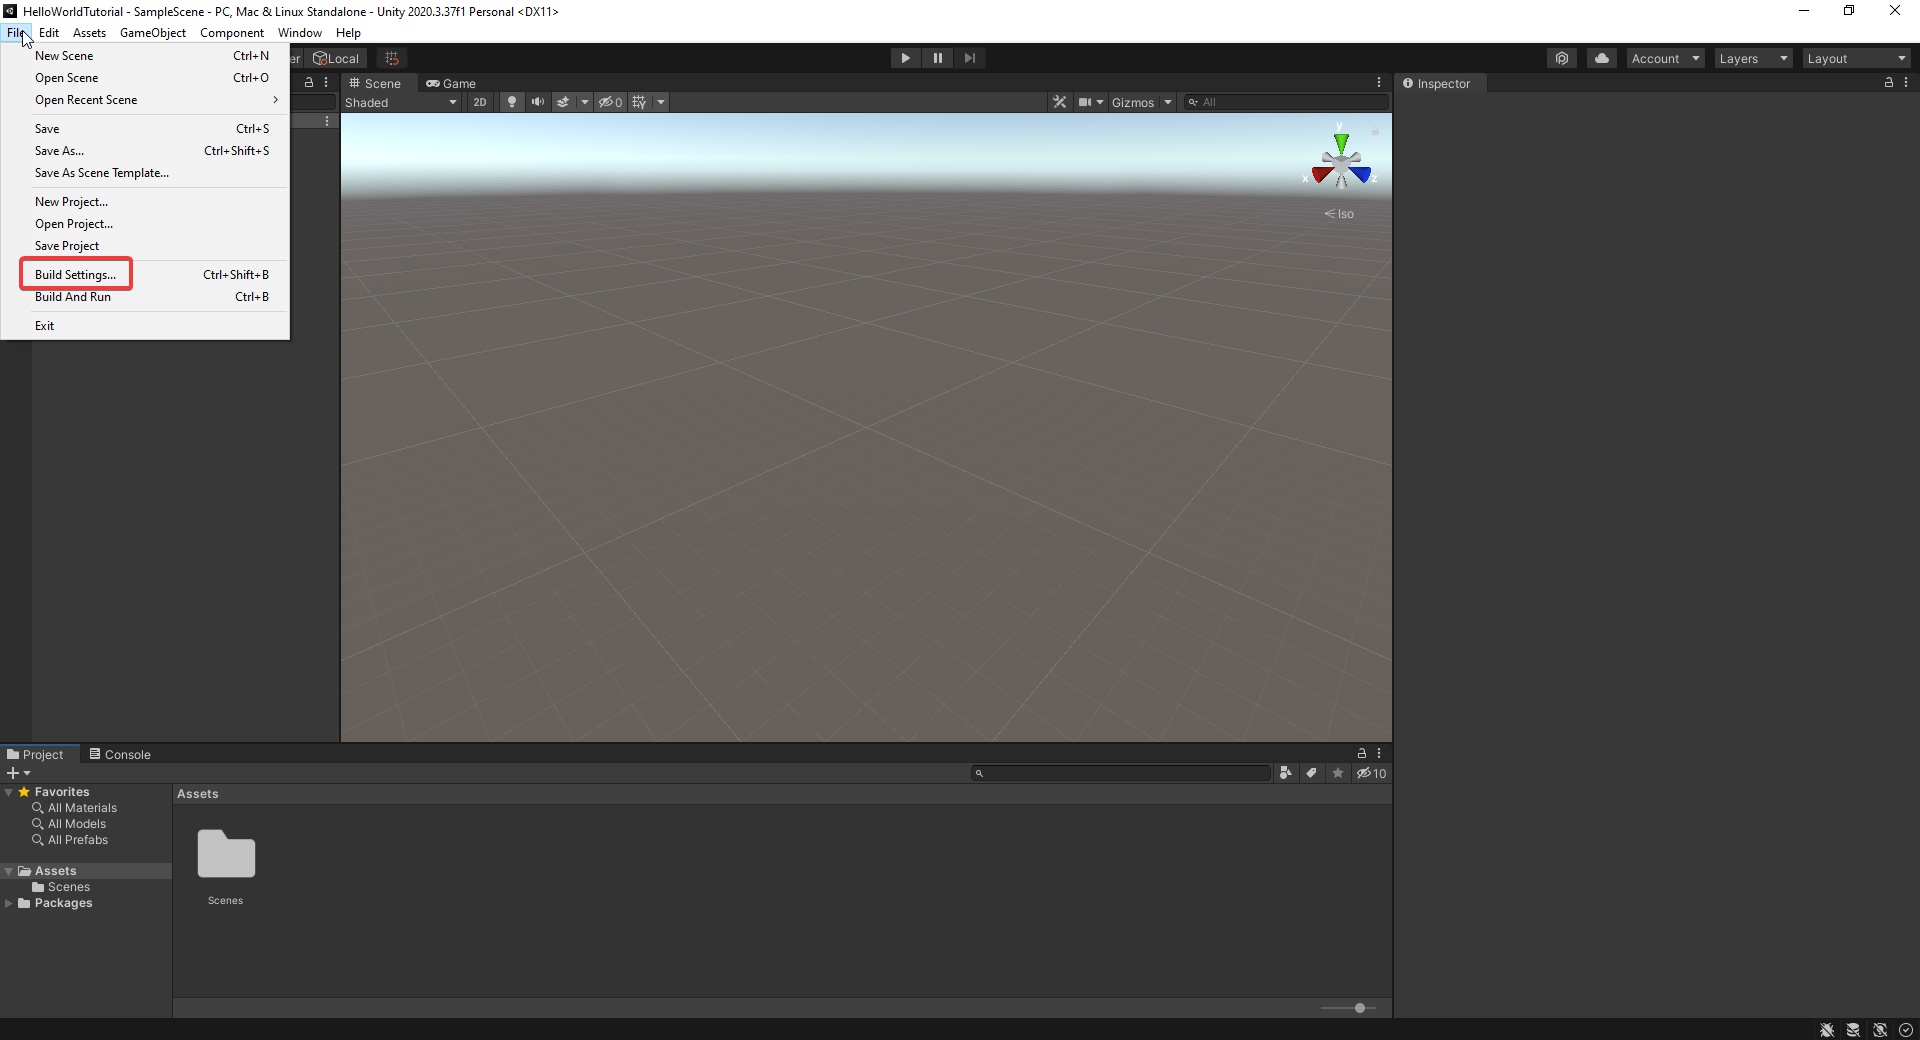
Once Unity has opened, we first must switch the build platform of the project. Recall that for the HoloLens, we develop Universal Windows Platform (UWP) apps. Unity does not default to a UWP build, therefore, we must manually switch to that build type. In Unity, navigate to File > Build Settings:
A new Build Settings window will pop up. You’ll notice that by default Unity sets the build platform to PC, Mac & Linux Standalone, we need to change that to Universal Windows Platform. In the Universal Windows Platform options pane, set the Target Device to HoloLens and the Architecture to ARM64. The rest of the settings should be fine left at their default values. You can double check by comparing the settings against the list below:
- Target Device: HoloLens
- Architecture: ARM64
- Build Type: D3D Project
- Target SDK Version: Latest Installed
- Minimum Platform Version: 10.0.10240.0
- Visual Studio Version: Latest Installed
- Build and Run on: Local Machine
- Build Configuration: Release
- Copy References: Unchecked
- Copy PDB Files: Unchecked
- Development Build: Unchecked
- Compression Method: Default
Finally, click Switch Platform:

Use the Mixed Reality Feature Tool to Import MRTK and OpenXR
Now we must import the MRTK packages and the OpenXR plugin into the Unity Project. Open the Mixed Reality Feature Tool and click Start:

Navigate into your Unity project’s folder and click Discover Features:
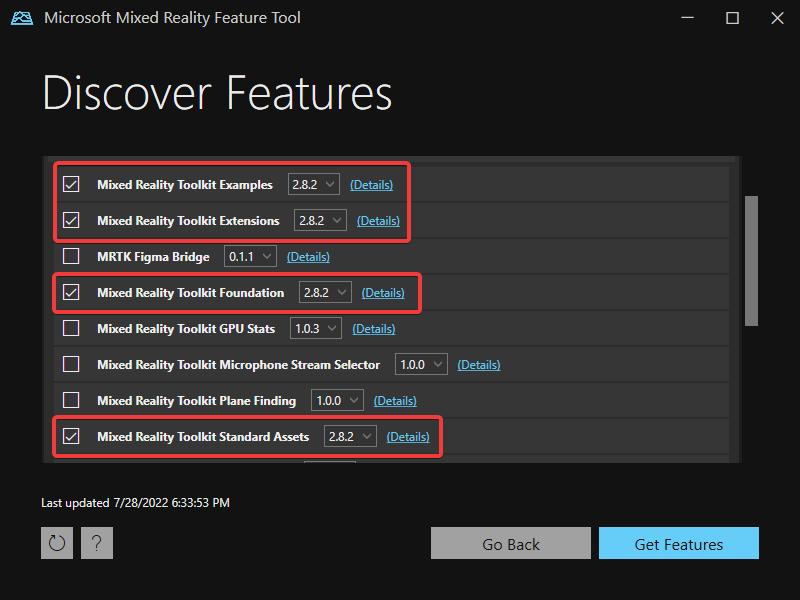
Expand the Mixed Reality Toolkit and the Platform Support categories and select the following features:
- Mixed Reality Toolkit Examples (2.8.2)
- Mixed Reality Toolkit Extensions (2.8.2)
- Mixed Reality Toolkit Foundation (2.8.2)
- Mixed Reality Toolkit Standard Assets (2.8.2)
- Mixed Reality OpenXR Plugin (1.4.3)
Then click Get Features:

For the vast majority of HoloLens apps, you will need to, at a minimum, import the Mixed Reality Toolkit Foundation and the Mixed Reality OpenXR Plugin. However, I encourage you to research the rest of these features on your own, because many contain powerful functionalities.
Click Validate to check if your project requires other dependencies to import the features. Here, we shouldn’t experience any validation errors and can go ahead and import the features:
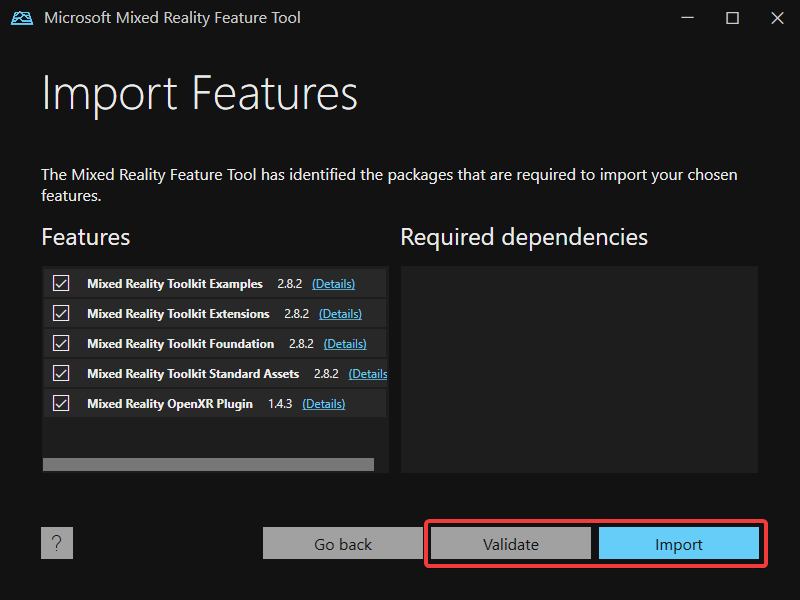
Lastly, we need to approve the import:

If everything was successful, you should see the window below and we can safely exit out of the Mixed Reality Feature Tool:

Configure MRTK and OpenXR
Upon returning to Unity, you’ll notice a loading bar has appeared indicating that the packages are being imported into Unity. Wait for this process to finish. Once completed, you should see a warning message similar to the following:

Click Yes, and wait for Unity to restart.
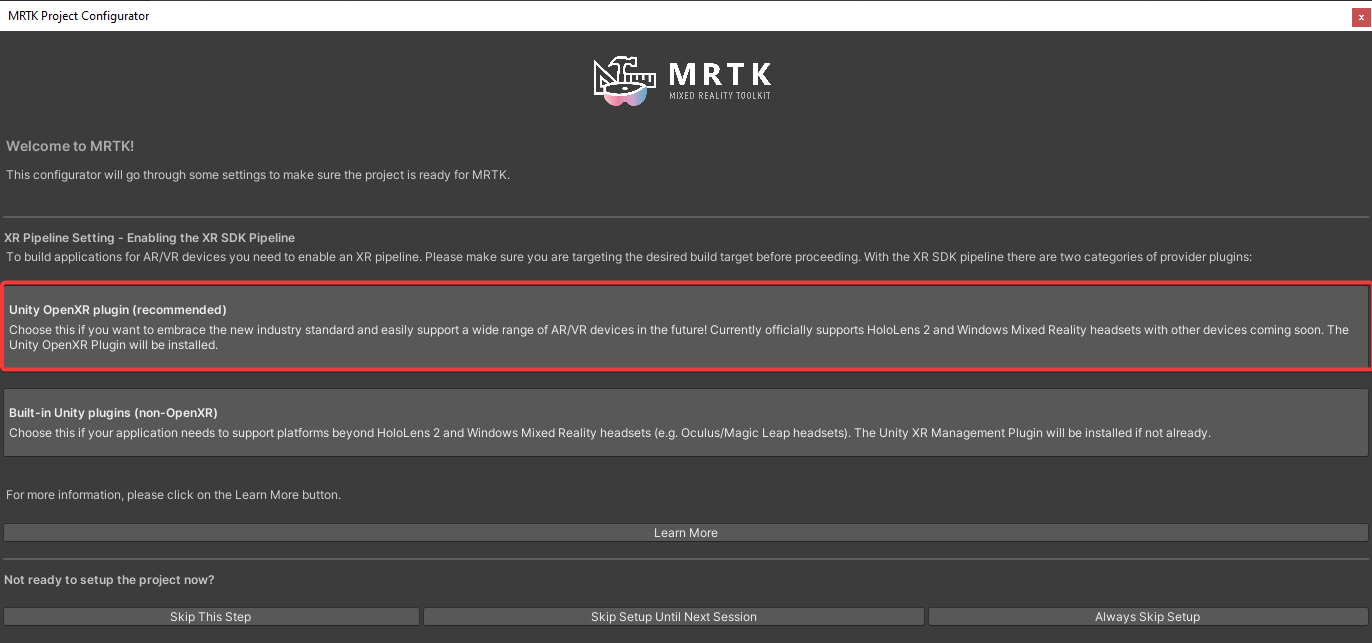
Once Unity has restarted, the MRTK configurator should automatically open. If it does not, you can manually open it by navigating to Mixed Reality > Toolkit > Utilities > Configure Project for MRTK:

In the MRTK configurator window, under the XR Pipeline Setting, select the Unity OpenXR plugin option:
On the next window of the MRTK configurator, click Show XR Plug-in Management Settings:

This should automatically open the XR Plug-in Management pane of the Unity Project Settings. If it doesn’t, Project Settings can be opened by navigating to Edit > Project Settings:

Then, one can access the XR Plugin-in Management settings by clicking on its tab located on the left side. In the settings, ensure that you are under the UWP settings tab at the top and click the OpenXR checkbox in the Plug-in Providers section:

Checking the OpenXR box will trigger the MRTK configurator to change to a new window. In this new window, click Apply Settings:

Return to the Unity main window and click on the Console tab of the Project Window:

In the Console Output Log, confirm the applying recommended project settings operation was performed and that no errors were encountered:
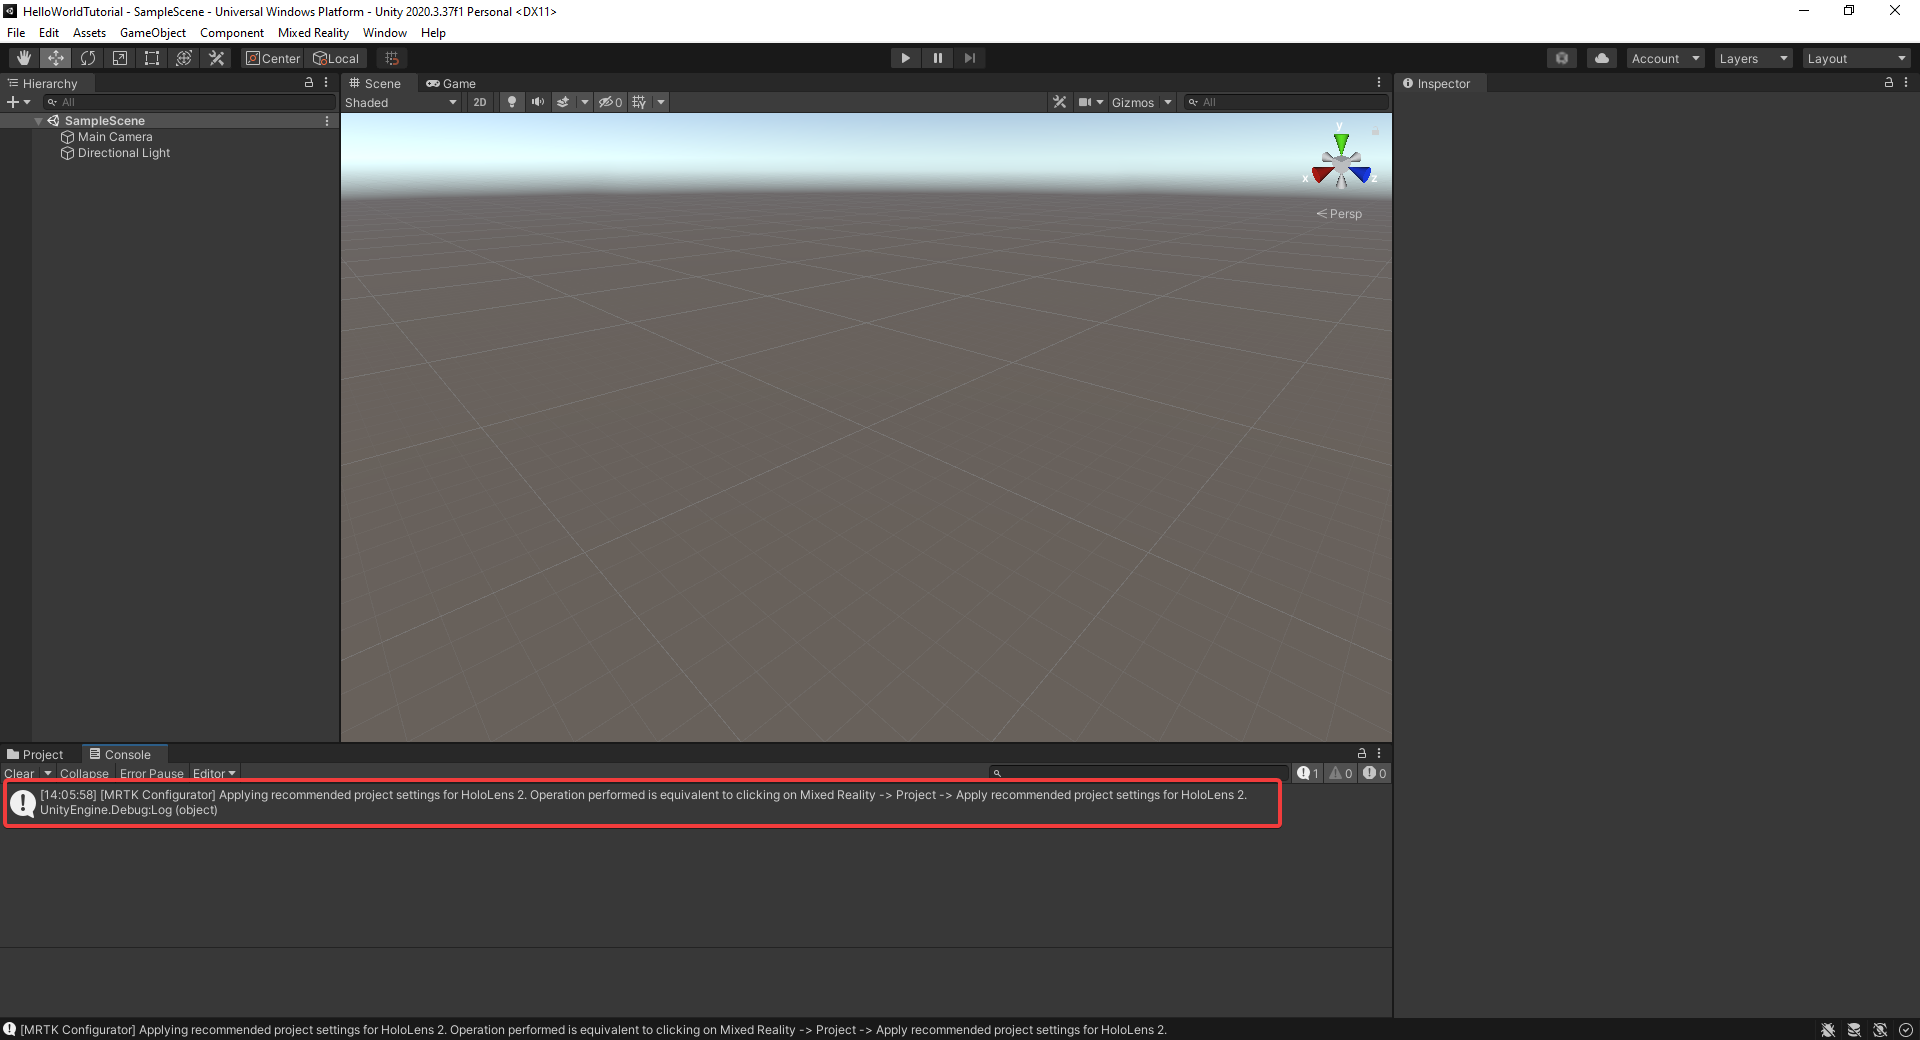
*Note, you may get an error regarding Holographic Remoting for Play Mode, you may safely proceed if this is the only error you encounter
Return to the MRTK configurator and click Next:

Finally, the MRTK configurator will prompt you to apply some other useful settings. Ensure that all the available check boxes under the Project Settings and the UWP Capabilities headers are checked and click Apply:

At this point, Unity should prompt you that its input system has changed and it needs to restart to for the change to take effect. Go ahead and restart Unity by clicking apply:

Wait for the Unity Editor to be restarted.
Add MRTK to the Scene and Configure
The last step of setting up the Unity project is to add and configure MRTK in the scene. Navigate to Mixed Reality > Toolkit > Add to Scene and Configure:

You should now notice that some new game objects have been added to your scene hierarchy. Click on the MixedRealityToolkit game object to expose its component in the inspector:
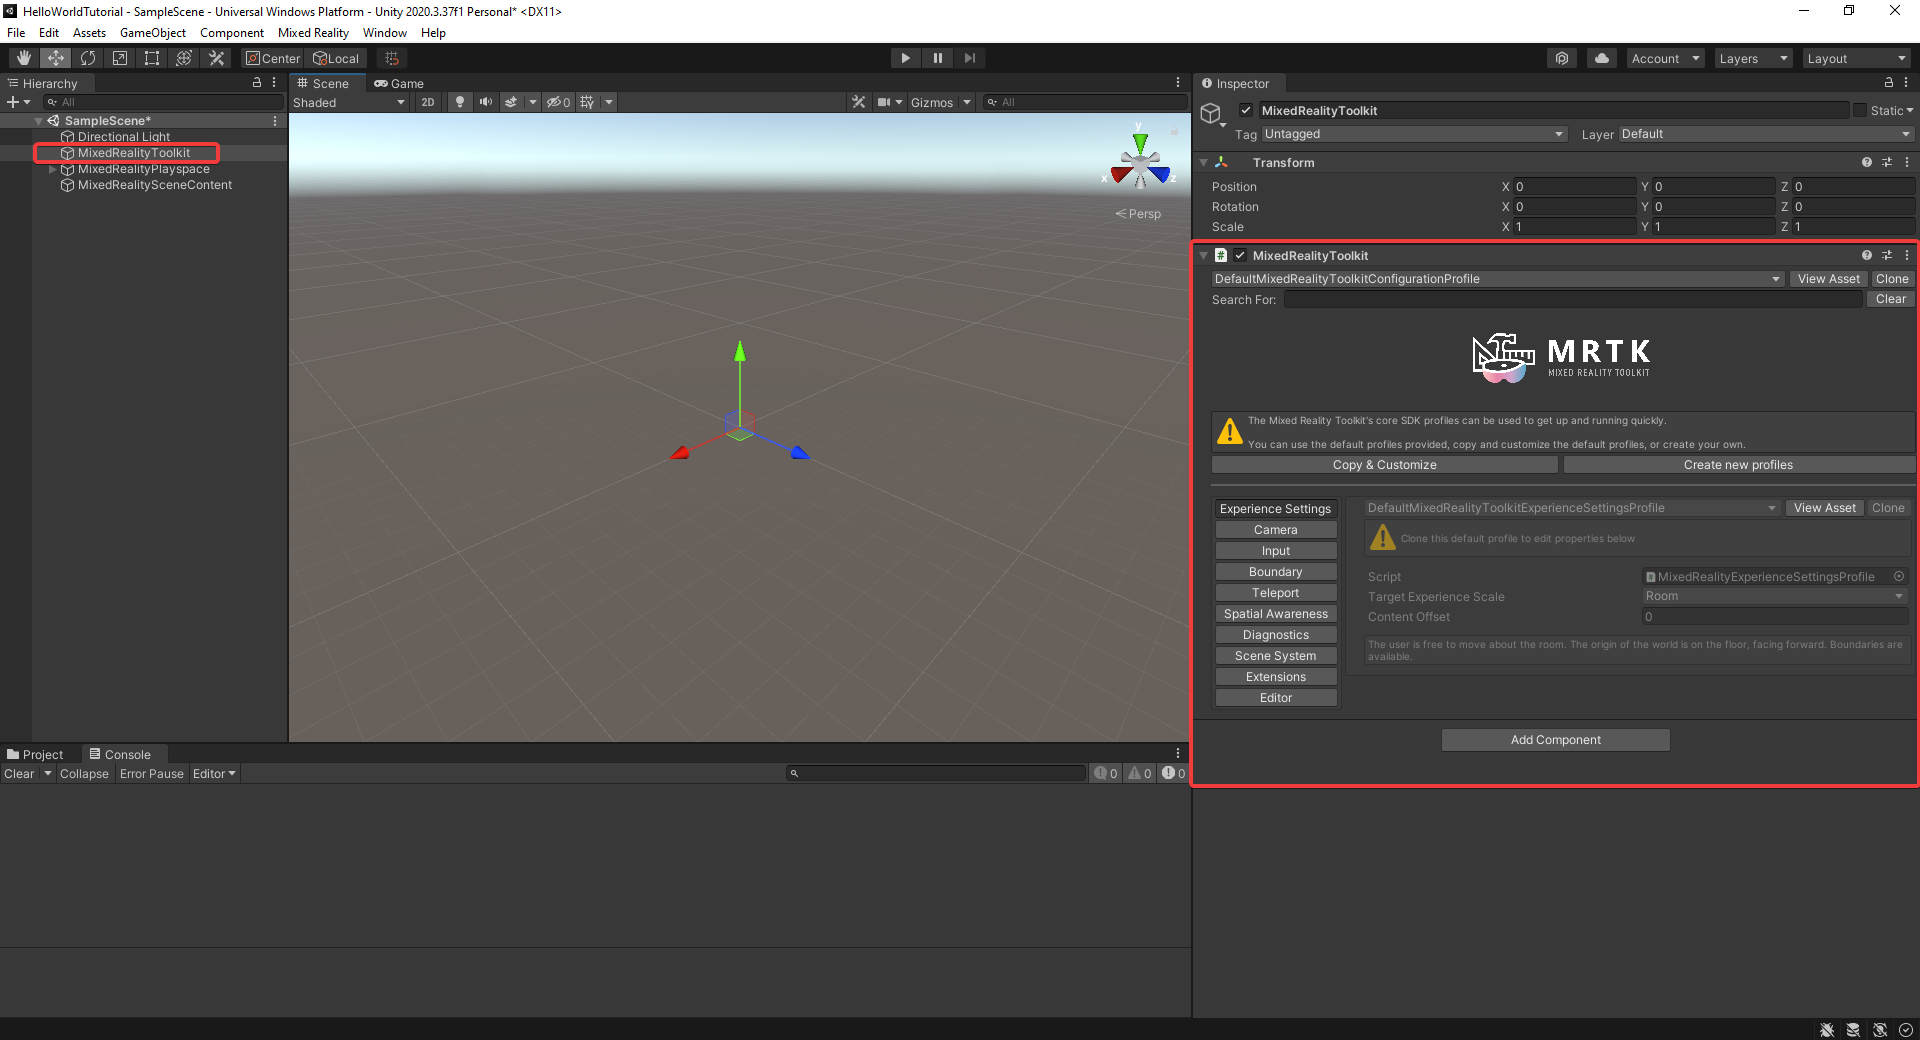
You can think of this MixedRealityToolkit component as the master controller of MRTK for your project. For this tutorial, we will leave most of the settings as default. However, we will turn diagnostics off and set the spatial awareness mesh to invisible. Each of the aspects of MRTK have an associated default profile that must be cloned in order to make changes. Click the clone button next to the Default Mixed Reality Toolkit Configuration Profile:

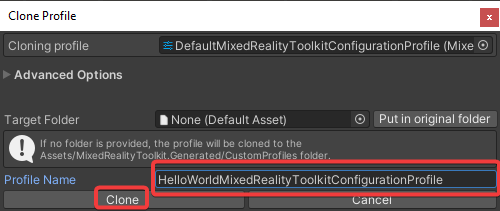
To create a custom MRTK profile for this tutorial, clone the Default Mixed Reality Toolkit Configuration Profile to a new Hello World Mixed Reality Toolkit Configuration Profile:
Next we will disable showing diagnostics. In the MixedRealityToolkit component, navigate to the Diagnostics tab and click Clone next to the Default Mixed Reality Diagnostics Profile:
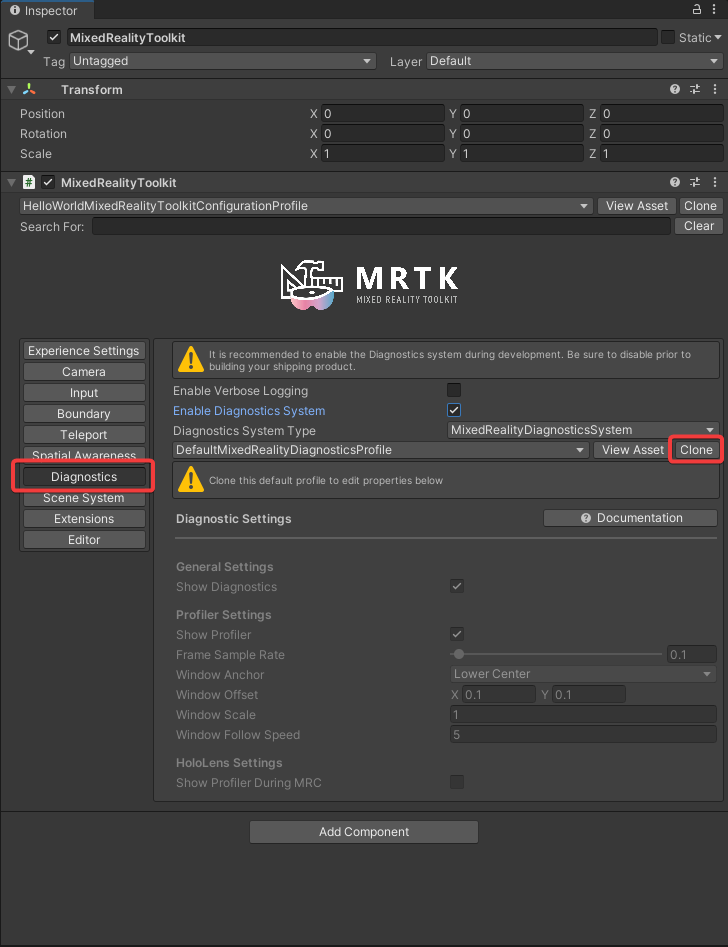
Clone the Default Mixed Reality Diagnostics Profile to a new Hello World Mixed Reality Diagnostics Profile:

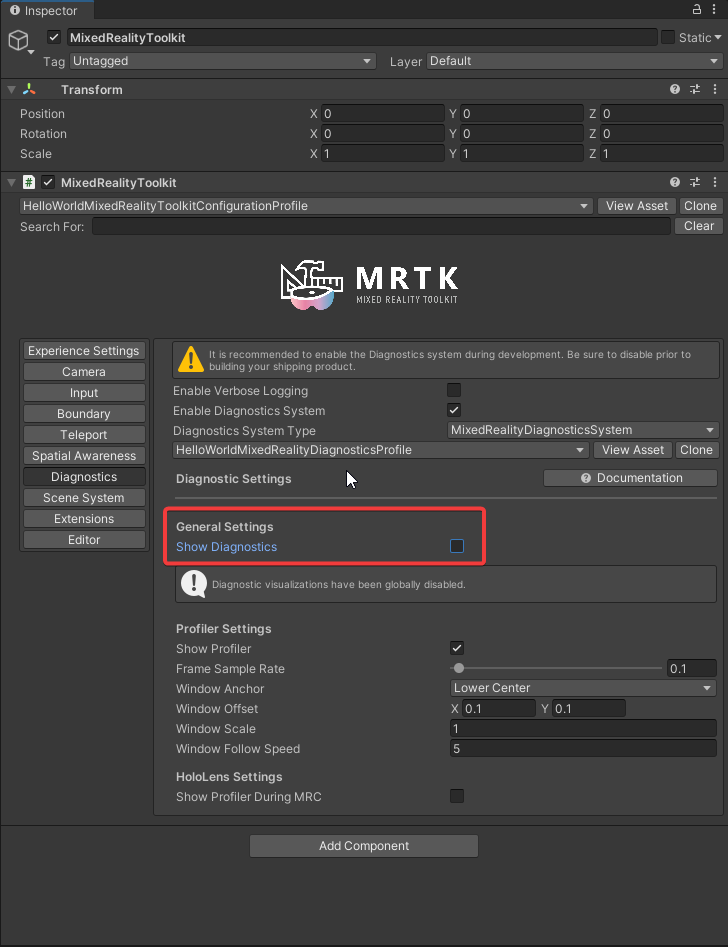
Under the General Settings header, uncheck Show Diagnostics:
Now we will disable the showing of the Spatial Awareness mesh. In the Mixed Reality Toolkit Component, navigate to the Spatial Awareness tab and click clone:

Clone the Default Mixed Reality Spatial Awareness System Profile to a Hello World Mixed Reality Spatial Awareness System Profile:

Now expand the XR SDK Windows Mixed Reality Spatial Mesh Observer and clone the default profile:

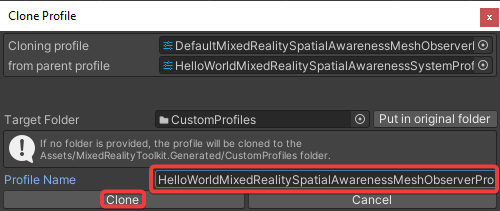
Clone the Default Mixed Reality Spatial Awareness Mesh Observer Profile to a new Hello World Mixed Reality Spatial Awareness Mesh Observer Profile:
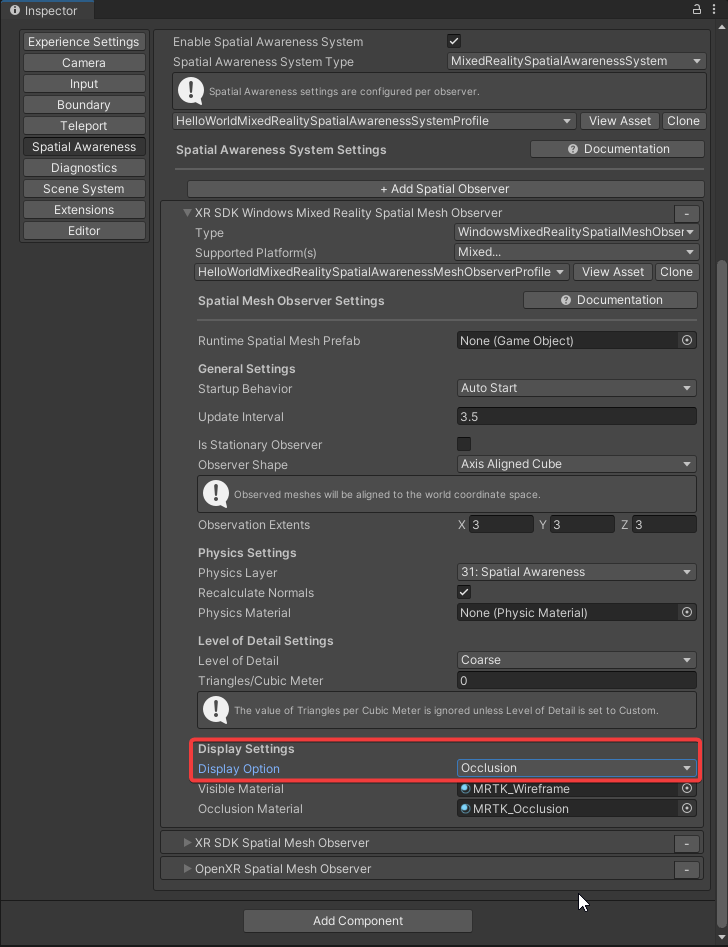
Under the Display Settings header, change the Display Option from Visible to Occlusion:
Next expand the XR SDK Spatial Mesh Observer tab and assign the HelloWorldMixedRealitySpatialObserverProfile to it:

Repeat this process with the OpenXR Spatial Mesh Observer tab as well:

I know this has been a tedious process, but we’re finally done setting up our Unity project for HoloLens development. Navigate to File > Save, to save your scene and File > Save Project, to save all of the configurations.
Step 3: Develop the “Hello World” App
Now we are ready to begin developing our Hello World app. We’ll begin by designing our holographic scene. In order to make the holograms hand manipulable, we’ll configure some MRTK components on those scene objects. Lastly, we’ll use Unity to build the project to a Visual Studio solution.
Design the Scene
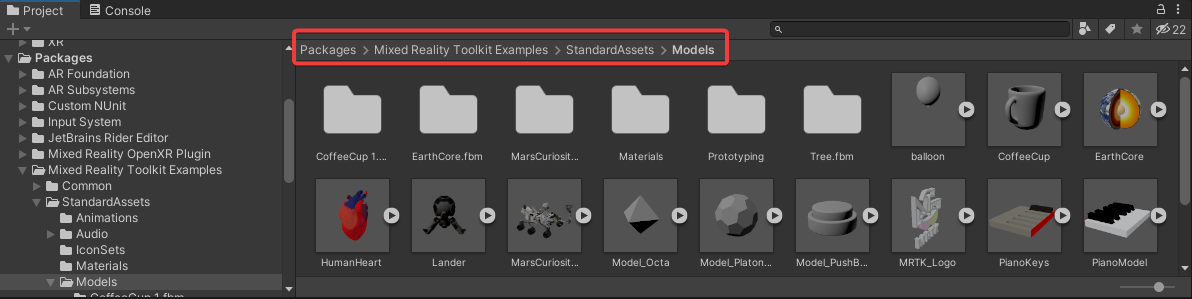
We’ll use models provided in the MRTK examples package to create a simple “Hello World” scene. In the Project Window, navigate to Packages > Mixed Reality Toolkit Examples > StandardAssets > Models:
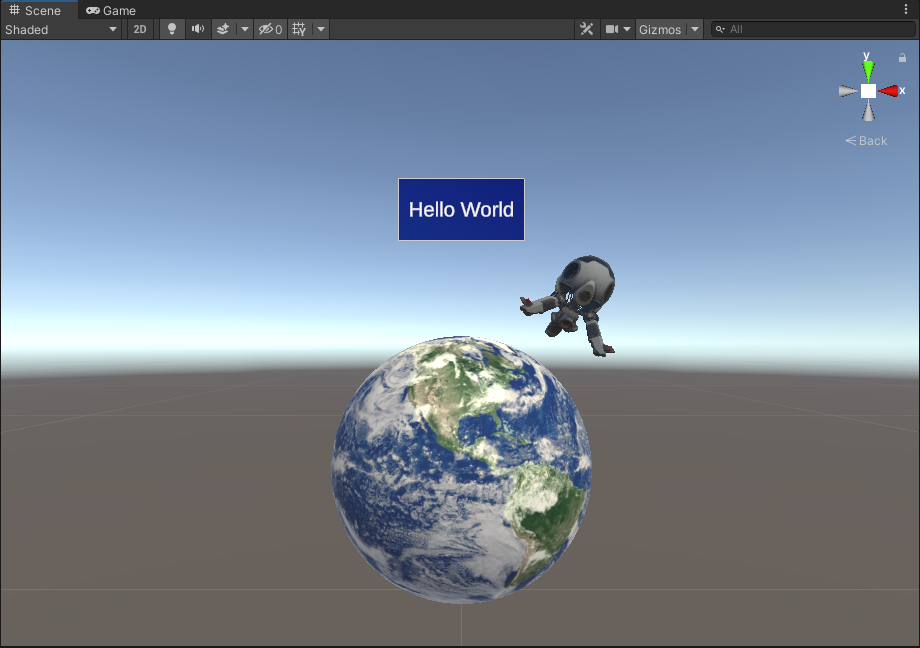
Let’s use the EarthCore and the Lander models in our scene. The basic idea will be to create a scene in which the Lander is floating above the EarthCore model, with a text box coming from the Lander saying “Hello World”.
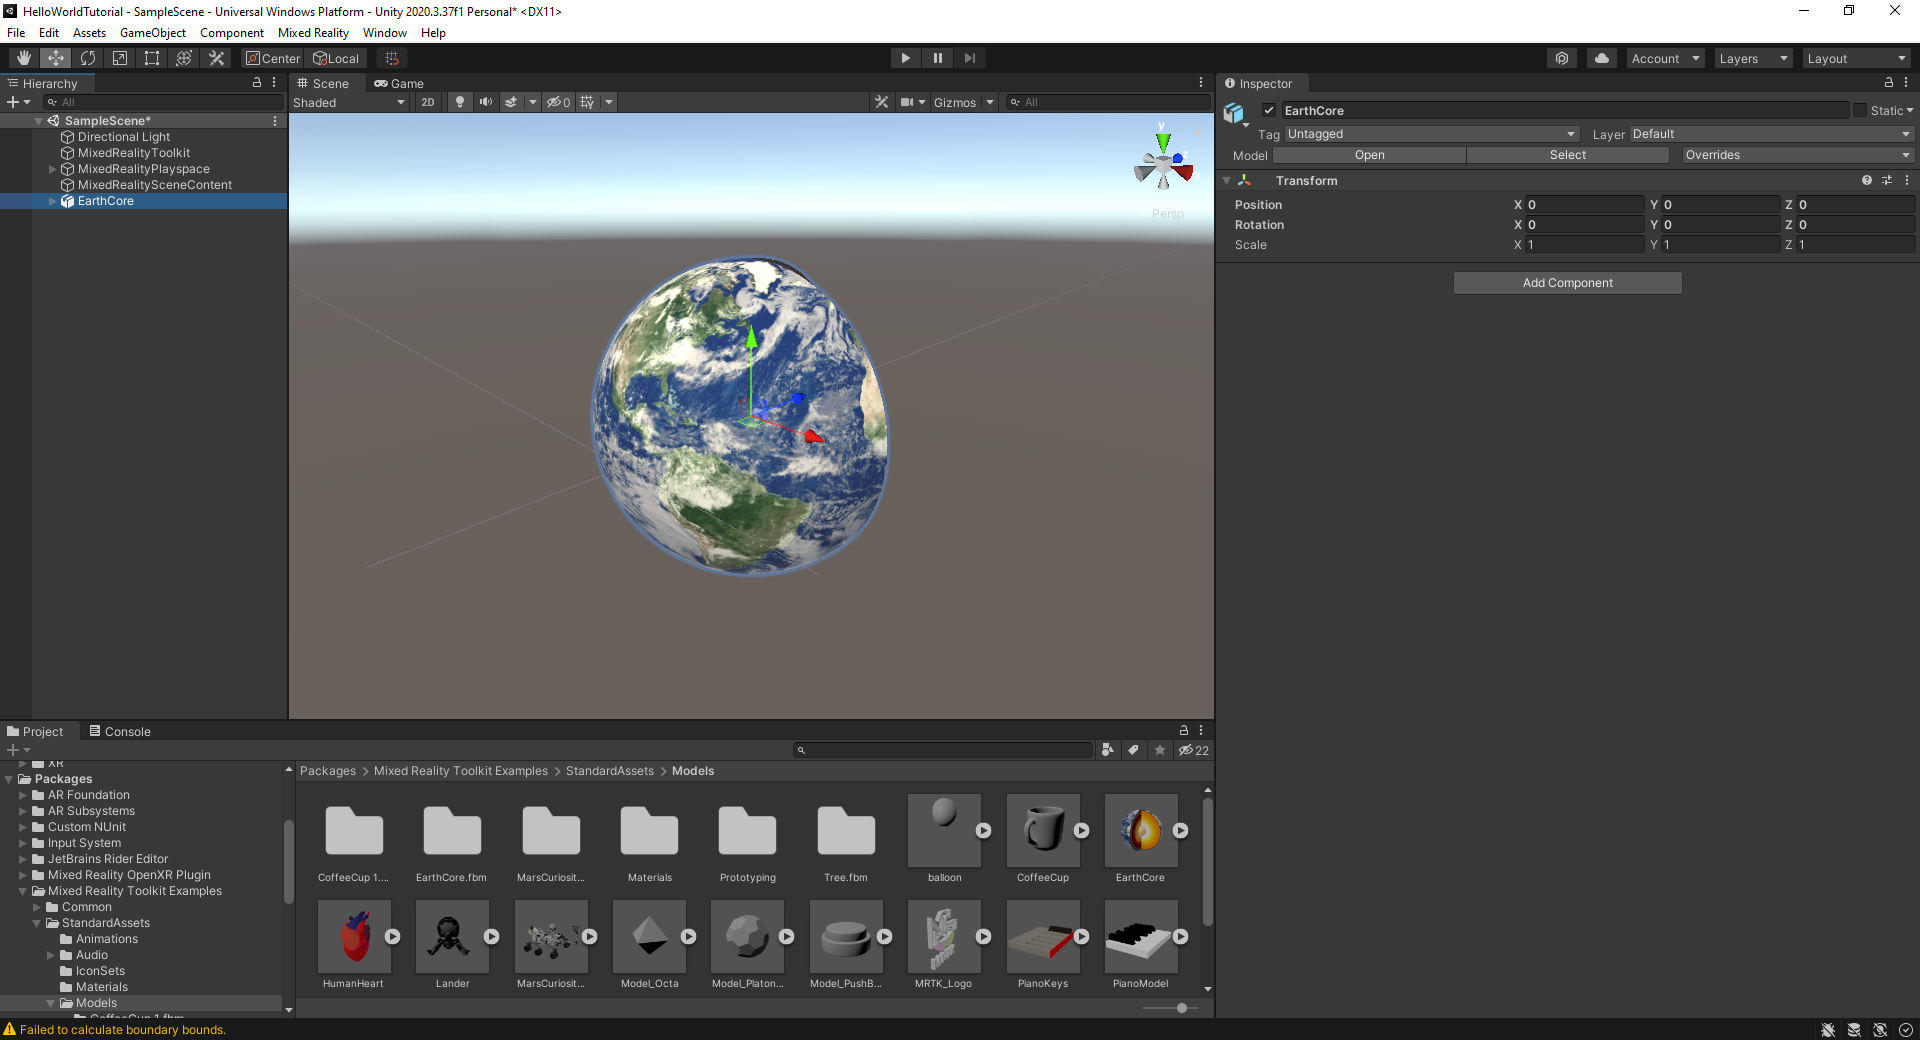
Start by dragging the EarthCore model into the Scene Hierarchy to create an EarthCore game object:

Double click on the EarthCore game object to center your scene view on the EarthCore model:
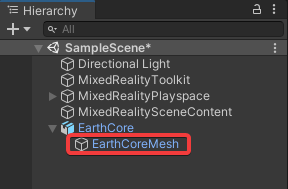
If you expand the EarthCore game object, you’ll notice a child game object named node_id30. By selecting the node_id30 game object and examining the Inspector panel, you’ll realize that this is the game object that actually contains the mesh and materials of the EarthCore model:

It is common for game objects to be nested in this way, with a parent and children game objects.
However, the name node_id30 is a very unintuitive name. Right click on the node_id30 game object and select the Rename option. Rename the node_id30 game object to “EarthCoreMesh” so we know that it is the game object with the model’s mesh components:
You may also notice that each game object has a Transform component attached in its Inspector:
A fundamental function of the Transform component is to describe where game objects are in the scene and their spatial relationships with one another. The EarthCoreMesh game object appears to have some strange values set in its Transform component. Let’s set the EarthCoreMesh Transform component values to the following:
- Position = (0, 0, 0)
- Rotation = (0, 0, 0)
- Scale = (1, 1, 1)
Note that transforms are always relative to their parent game object transforms. Because the EarthCoreMesh game object is a child of the EarthCore game object, changing its transform position to (0, 0, 0) means that it will track the position of its EarthCore parent.
Now, we have to remember that when we launch our application on the HoloLens, the initial position of the device is set as (0, 0, 0). Therefore, if we left the Transform components as they are, the holograms would be rendered right in the same position as our head. This is not a very optimal design. Instead let’s adjust the Transform component of the EarthCore game object such that the model is sitting 1 meter in front of the user on application startup. Because the +z axis represents “forward” (i.e. the direction you are looking) when you start the application, change the z position of the EarthCore game object to 1:
Now let’s add another model to the scene. Again, in your project panel, navigate to Packages > Mixed Reality Toolkit Examples > Standard Assets > Models. Locate the Lander model and drag it into your scene Hierarchy:

It seems like our Lander model is much too large as compared to our EarthCore model. Let’s adjust the Transform component of this so that the Lander is smaller and is positioned to seem as though it is orbiting the EarthCore model. Change the Transform component of the Lander model to match the following:
- Position = (0.075, 0.2, 1)
- Rotation = (0, 0, -30)
- Scale = (0.1, 0.1, 0.1)
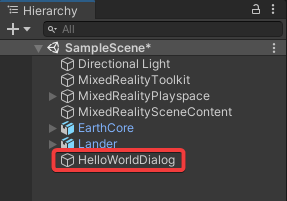
Finally, let’s create a dialog panel to display the classic “Hello World” text. In the top menu, click GameObject > Create Empty, to create an empty game object in the scene Hierarchy:
Rename this newly created game object to “HelloWorldDialog” by right clicking the game object and selecting Rename. Your scene Hierarchy should now look like this:
Now we will create a Quad game object as a child of our HelloWorldDialog to serve as the backplate for our text. Right click on the HelloWorldDialog game object and select 3D Object > Quad:

Let’s rename the Quad game object to better reflect its purpose. Right click on the Quad game object and choose Rename to rename the object to BackPlateQuad:

Now, we will adjust the Transform component of the BackPlateQuad to scale it to an appropriate size. Change the values of the BackPlateQuad game object’s Transform component to:
- Position = (0, 0, 0)
- Rotation = (0, 0, 0)
- Scale = (0.1, 0.05, 0.01)
Now let’s change the material of the BackPlateQuad game object. We’re going to use the default MRTK backplate material. In the project window, navigate to Packages > Mixed Reality Toolkit Foundation > SDK > Features > UX > Interactable > Materials. In this folder, locate the material named HolographicBackPlate:
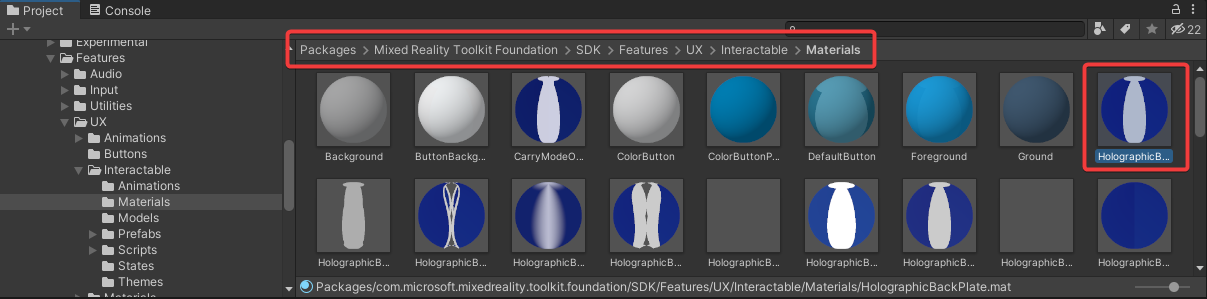
To apply this material, drag the HolographicBackPlate material from the project window onto the BackPlateQuad game object in the scene hierarchy:

Now, let’s adjust the Transform component of the parent HelloWorldDialog game component to properly position the dialog box in the scene. Click on the HelloWorldDialog game object and change its transform component values to the following in the inspector:
- Position = (0, 0.3, 1)
- Rotation = (0, 0, 0)
- Scale = (1, 1, 1)
Finally, let’s add the “Hello World” text. We’re going to create a text game object that is a child of the HelloWorldDialog game object. Right click the HelloWorldDialog game object and click Create Empty. Now right click the newly created GameObject and rename it to “HelloWorldTMP”. Now your scene hierarchy should look like this:

To display the actual text, we’re going to use the TextMeshPro (TMP) package. TMP is a robust text rendering package and is widely regarded as the preferred method for showing text. To import TMP, in the top menu, click Window > TextMeshPro > Import TMP Essential Resources:

This will open up the Unity package importer. Ensure all of the components are checked and click Import:

When the import has finished, click on the HelloWorldTMP game object in the scene Hierarchy. We will now add the text component to this game object. In the Inspector, click add component and search for “Text Mesh Pro – Text” and add that component:

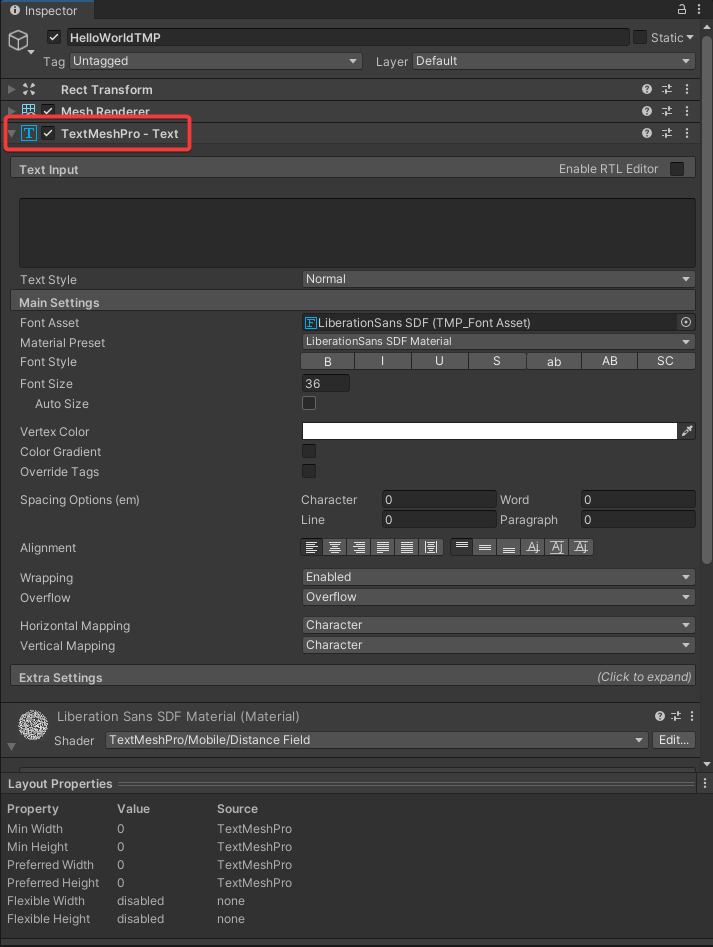
Note that when you add the Text Mesh Pro – Text component, a Rect Transform and Mesh Renderer are automatically added. Configure the TextMeshPro – Text component as follows:
- Text Input = Hello World
- Font Size = 0.16
- Alignment = Centered

Next, expand the Rect Transform component of the HelloWorldTMP game object and change the following values:
- Pos Z = -0.001
- Width = 0.1
- Height = 0.05
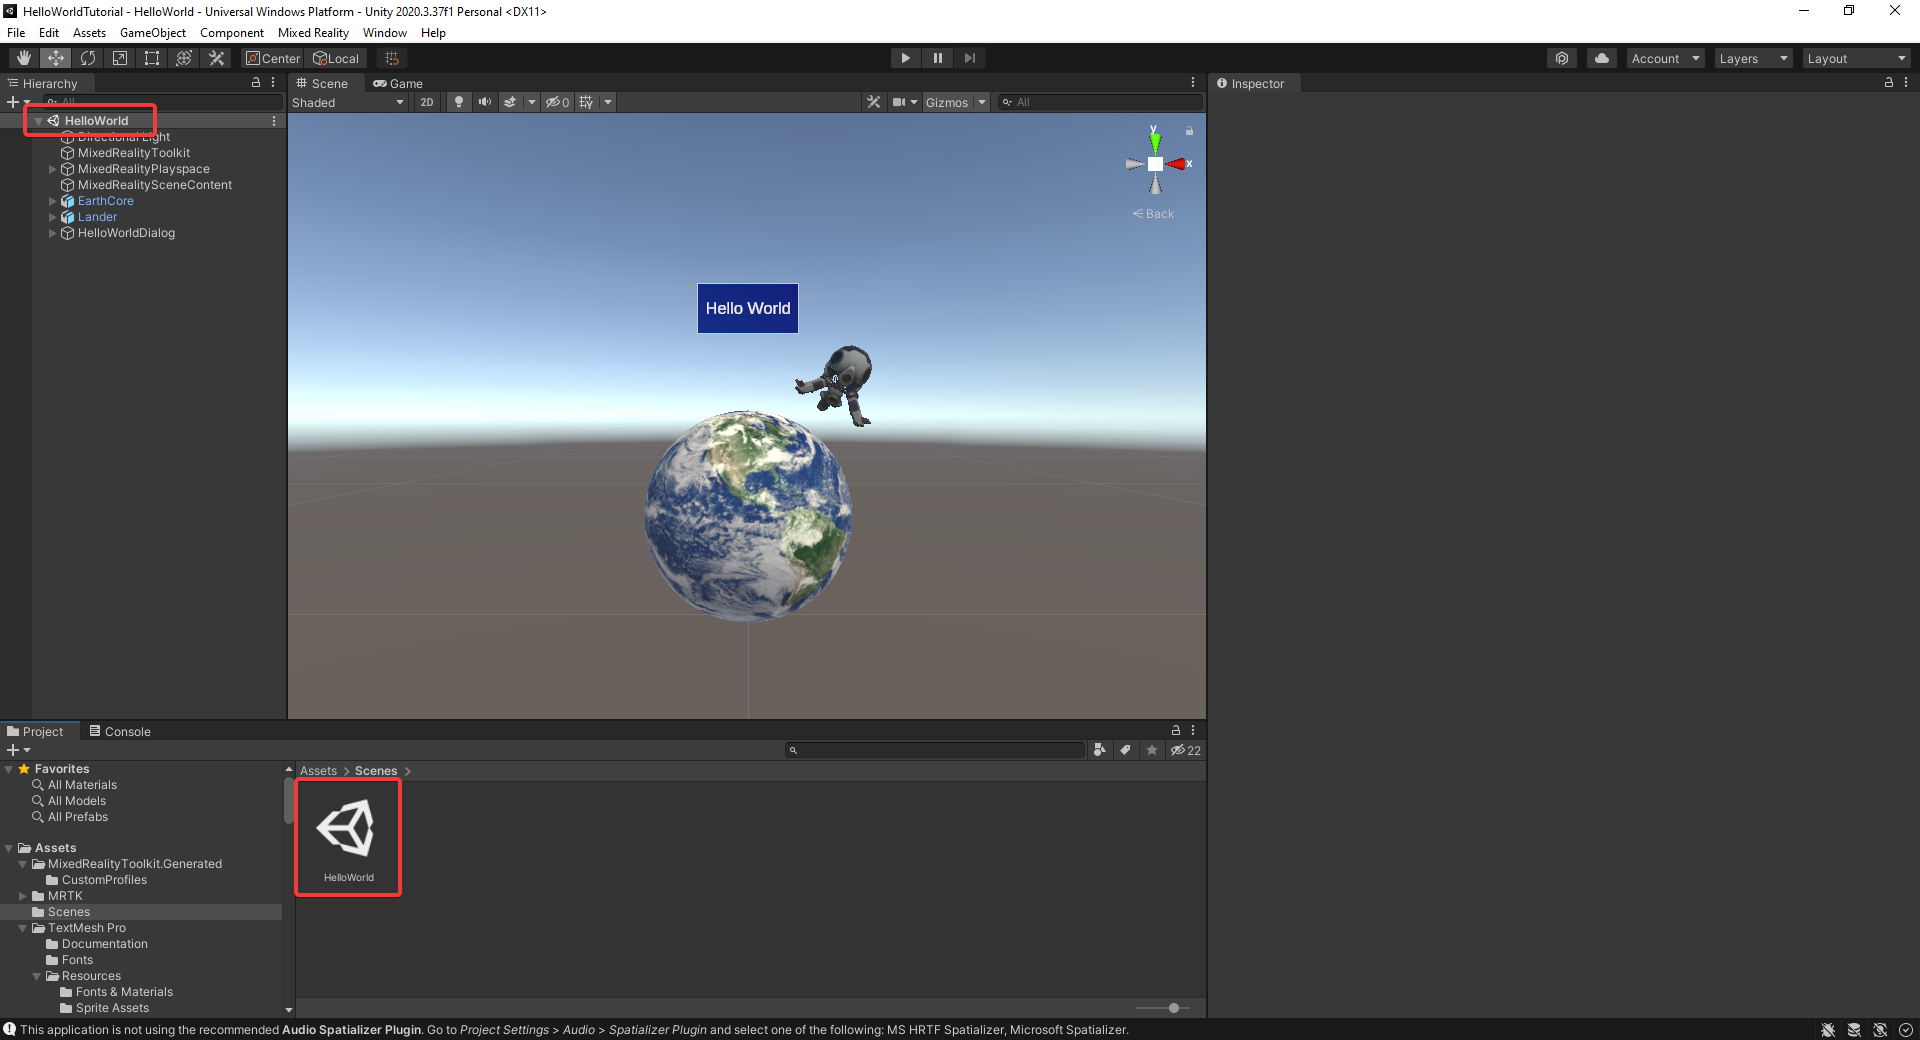
And with that, we have our simple “Hello World” scene:
Configure the Interactions
If we were to build and deploy this app right now, we would see a holographic rendering of our “Hello World” scene. However, it would be better if we could actually interact with the holograms. Fortunately, MRTK makes this quite easy to do. MRTK’s ObjectManipulator component makes an object movable, scalable, and rotatable using one or two hands. Combine this with the NearInteractionGrabbable component, which makes objects grabbable, and we can achieve holograms that are fully manipulable.
Let’s start with the EarthCore game object. Select the EarthCore game object in the scene hierarchy, and then using the Add Component button in the Inspector, add a Object Manipulator component:

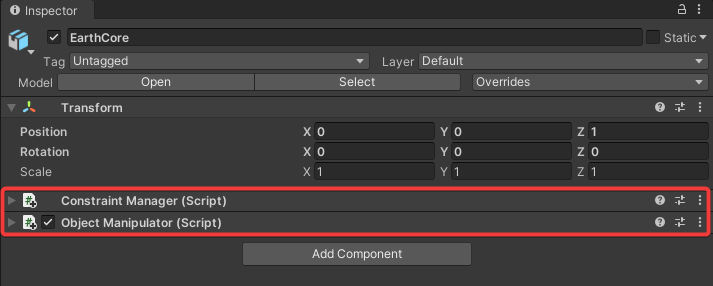
Note that when we add the Object Manipulator, a Constraint Manager component get automatically added as well.
Now, expand the EarthCore game object and highlight the child EarthCoreMesh game object. In the Inspector, use the Add Component button to add a Near Interaction Grabbable and a Mesh Collider component. Under the Mesh Collider component, check the Convex property:


Now let’s configure the Lander model. Highlight the Lander game object in the scene Hierarchy. In the Inspector, use the Add Component button to add a Object Manipulator component:


Now we need to add a NearInteractionGrabbable component to all the children game objects of the Lander game object. Expand the Lander game object and expand all children game objects such that your Hierarchy looks as follows:

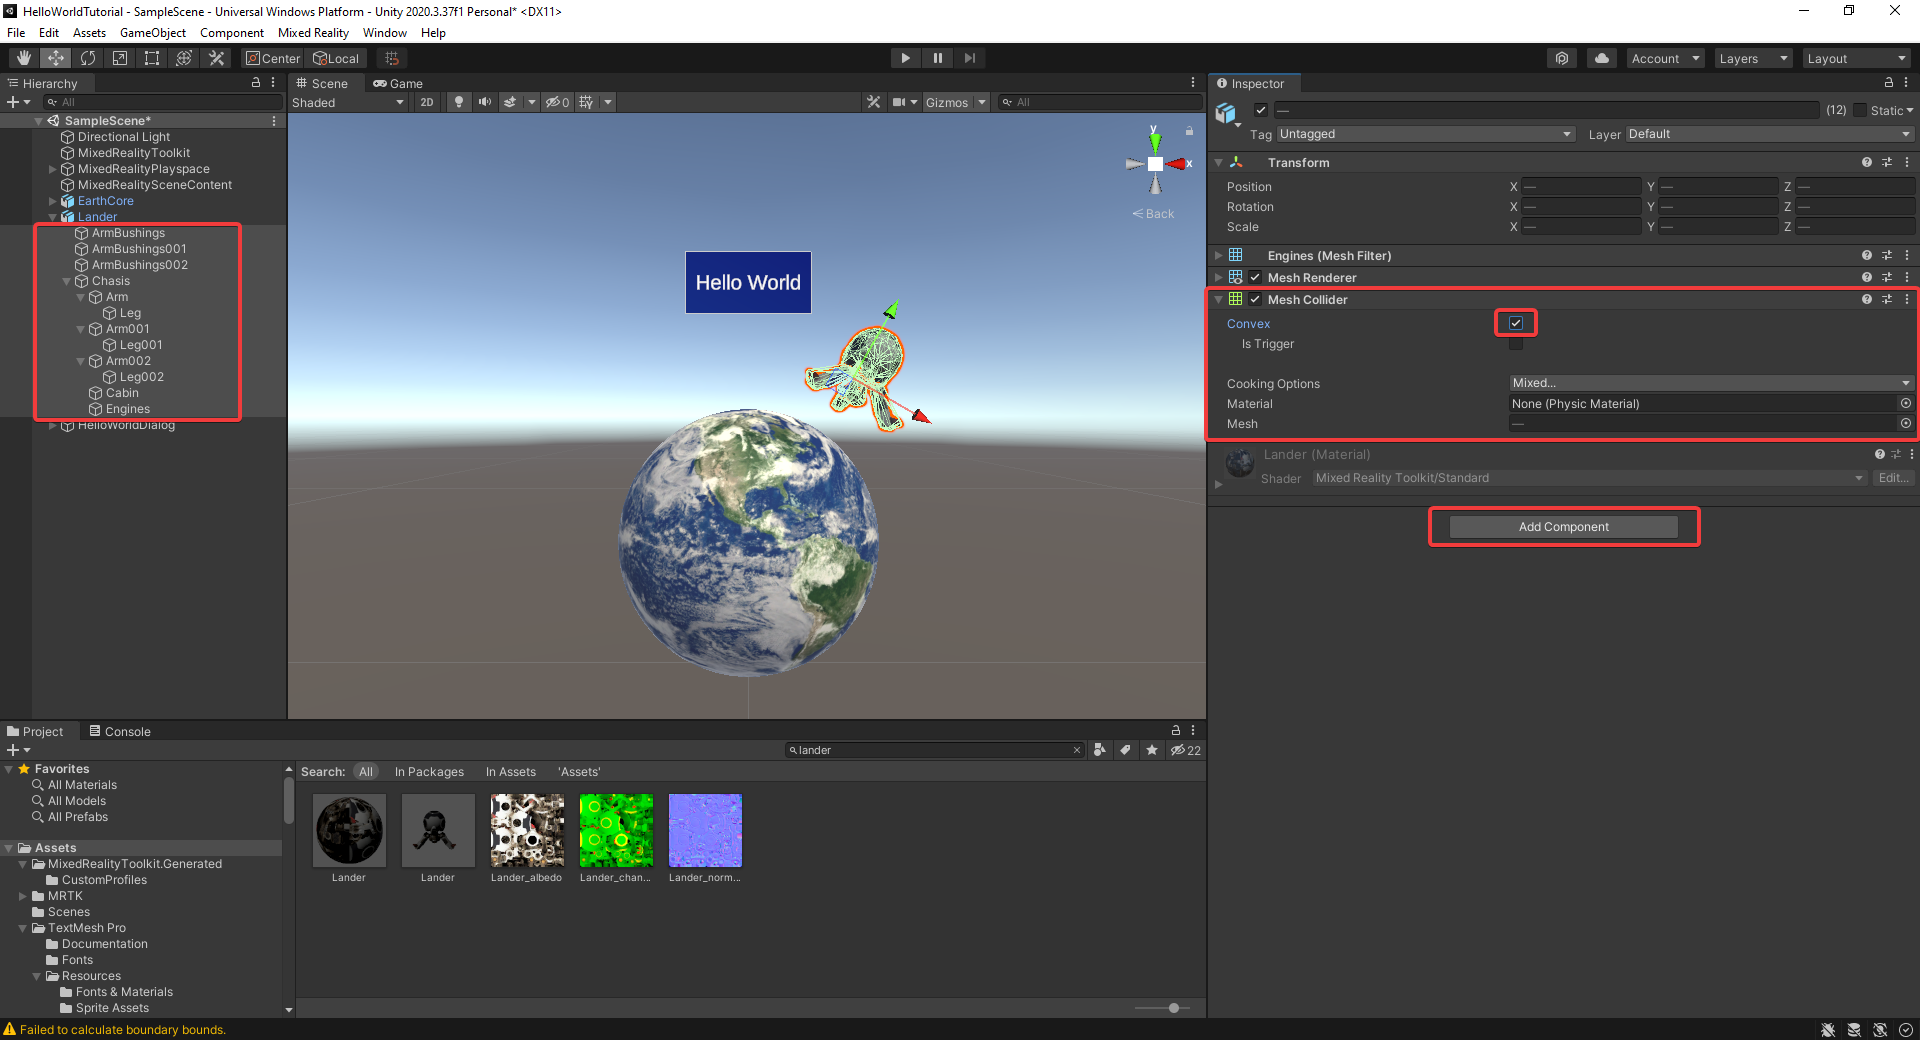
Now, select all the children game objects by clicking on the ArmBushings game object, then while holding the shift key, select the Engines game object, such that your hierarchy looks like:

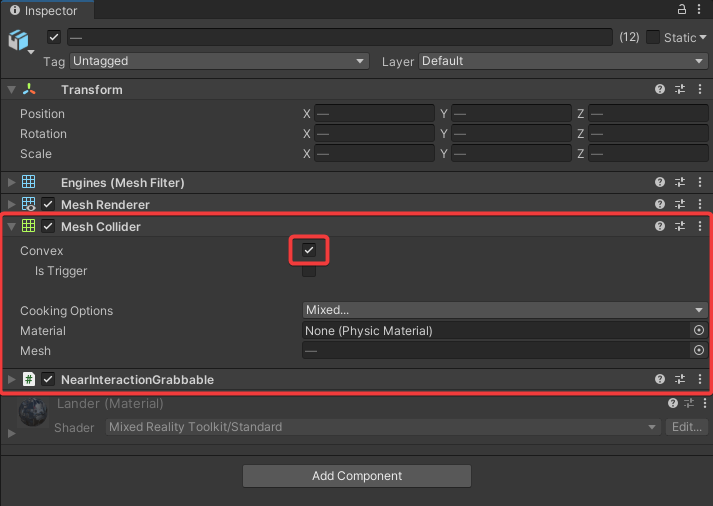
Now any changes that we make in the Inspector will affect all of the highlighted game objects. In the Inspector, check the Convex property under the Mesh Collider component and use the Add Component button to add Near Interaction Grabbable components:
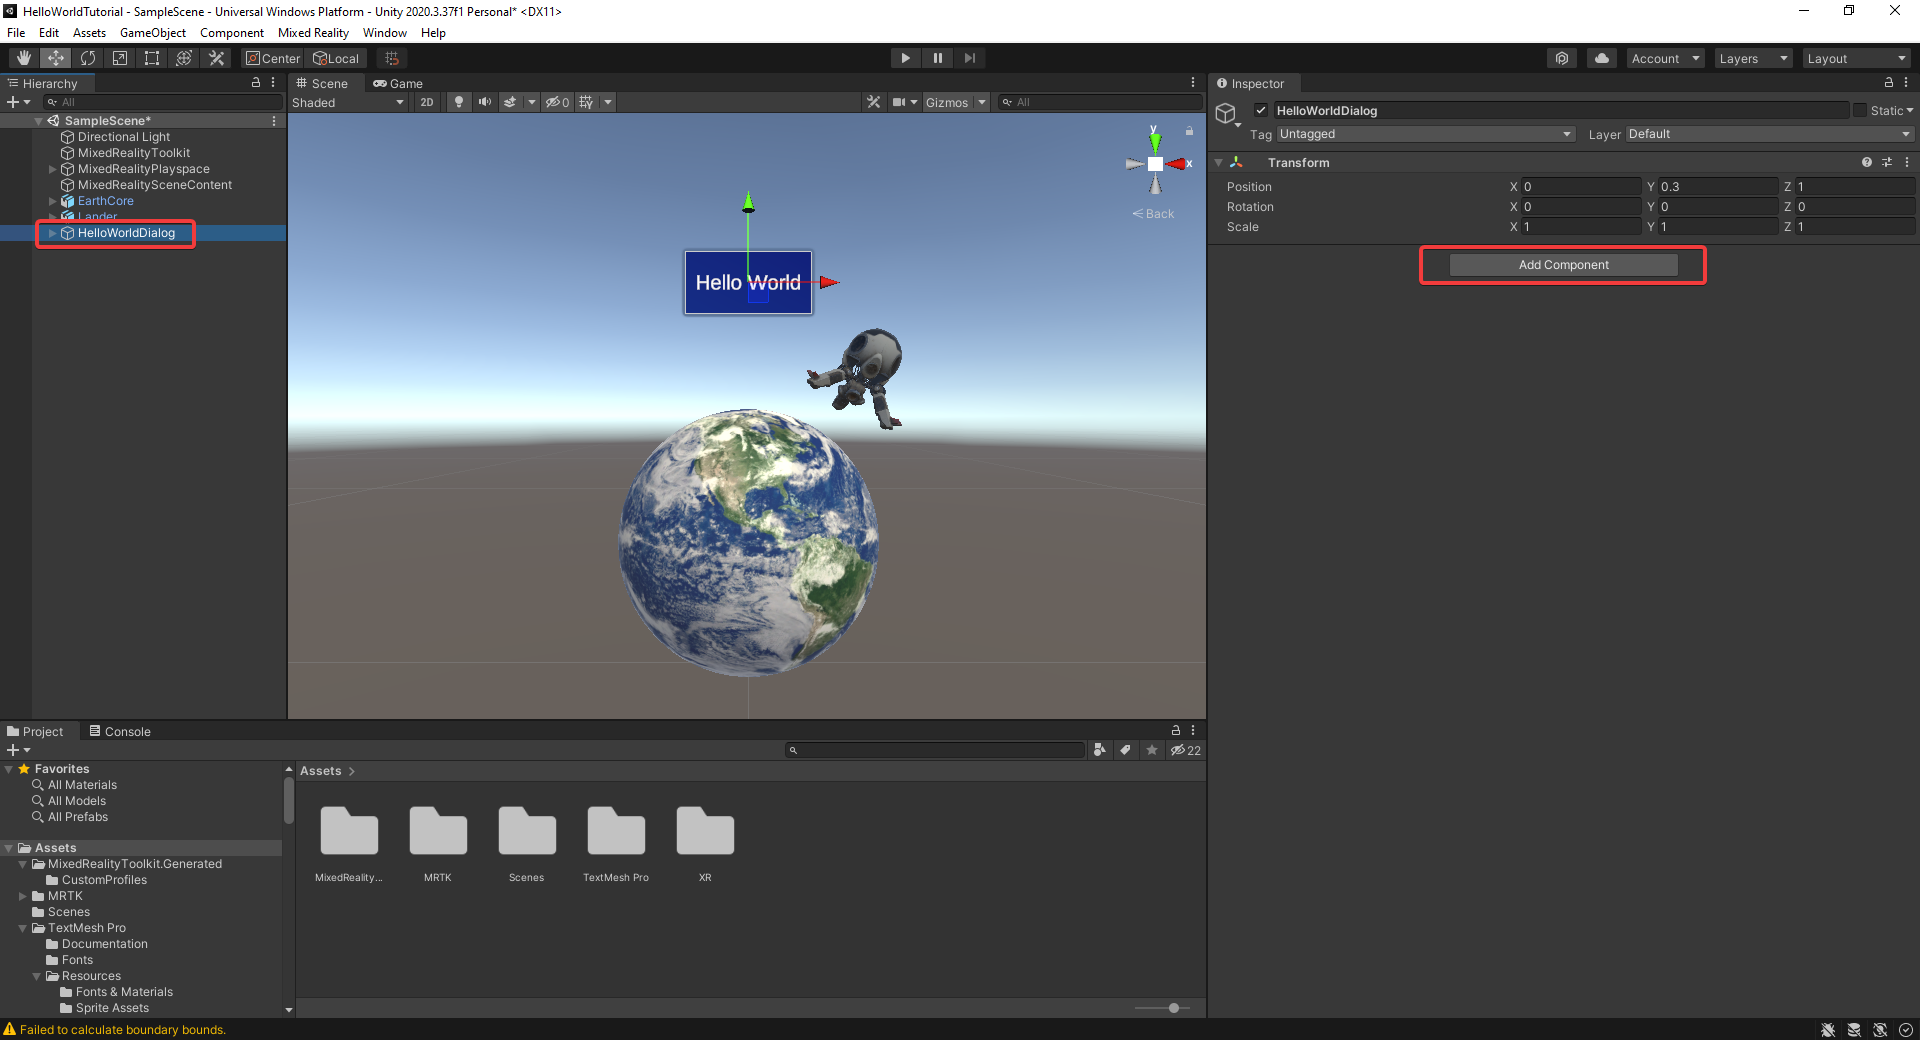
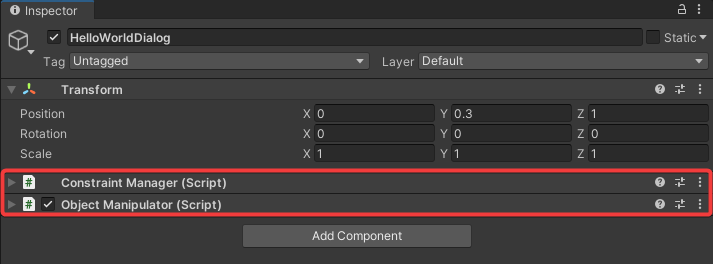
Lastly, let’s quickly configure the HelloWorldDialog game object. Select the HelloWorldDialog game object in the Hierarchy and using the Add Component button in the Inspector to add a Object Manipulator component:
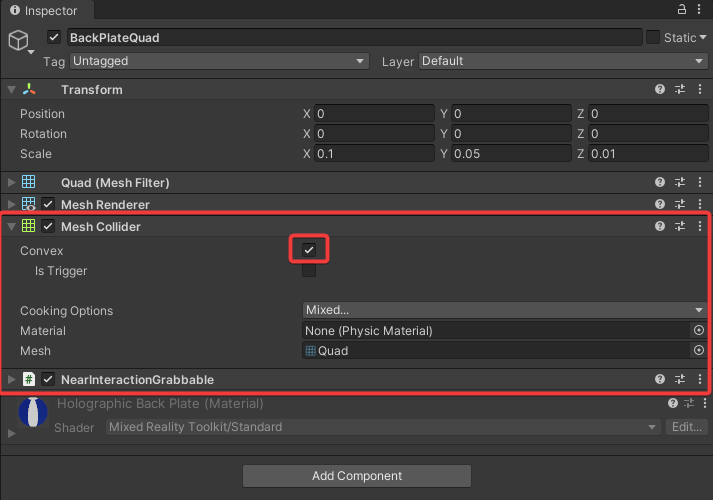
Next, expand the HelloWorldDialog game object and select the BackPlateQuad game object. In the Inspector check the convex property of the Mesh Collider component and use the Add component button to add a NearInteractionGrabbable component:

And with that, the Hello World application is finally completed. It would be a good idea to save the scene at this point by going to File > Save.
Test the App
Before we build and deploy the app to the HoloLens, let’s test the app in the unity editor. At the top of the Unity Editor, push the button with the “play” symbol:
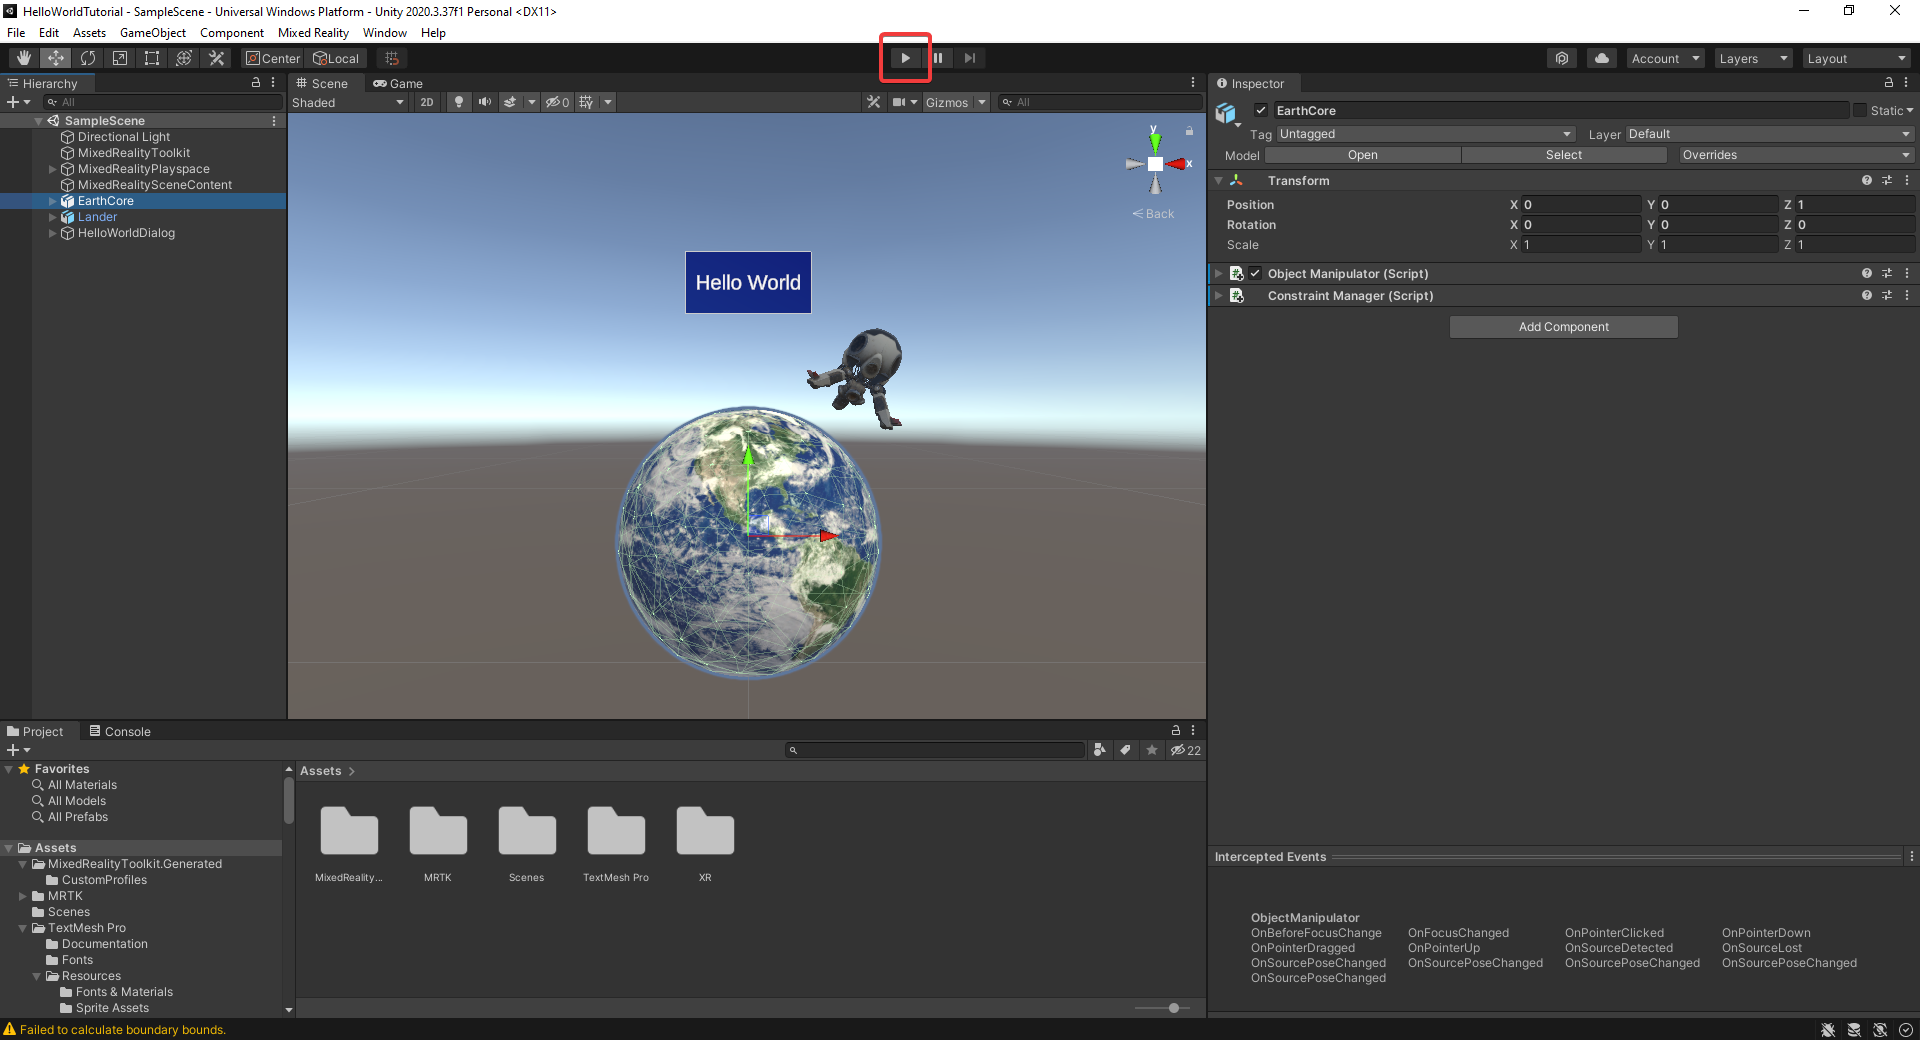
This will launch us into the game view, which is a preview of how the app will behave on the HoloLens. While in game view, you can simulate 3D input with the following keyboard and mouse inputs:
- W, S, A, D, Q, E = Move Forward, Backward, Left, Right, Down, Up
- Hold Right Mouse Click = Look around
- Hold Space Bar = Enable Simulated Hand Input
Enter game mode, and experiment with moving the objects around by holding the space bar, placing the raycaster on an object, holding the left mouse click, and moving the mouse around:

Build the App
Before we build the app, let’s rename the scene to HelloWorld. In the project window, navigate to Assets > Scenes:
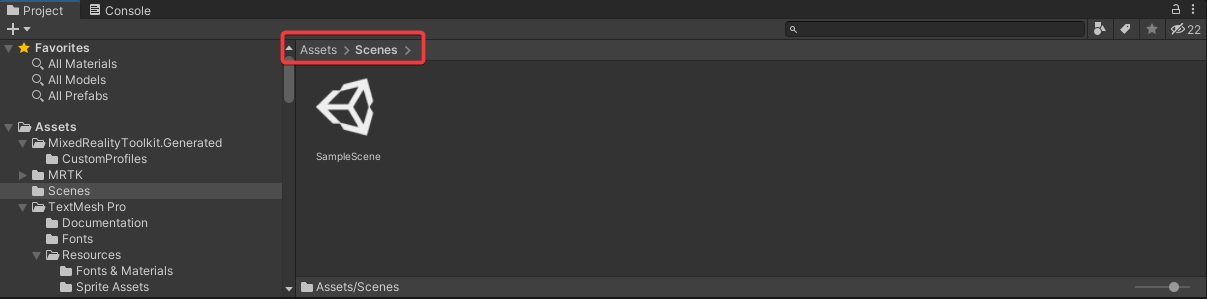
Right click on the SampleScene (this should be the scene that we have been working under) and rename it to HelloWorld, it will prompt you to reload the scene, click Reload:
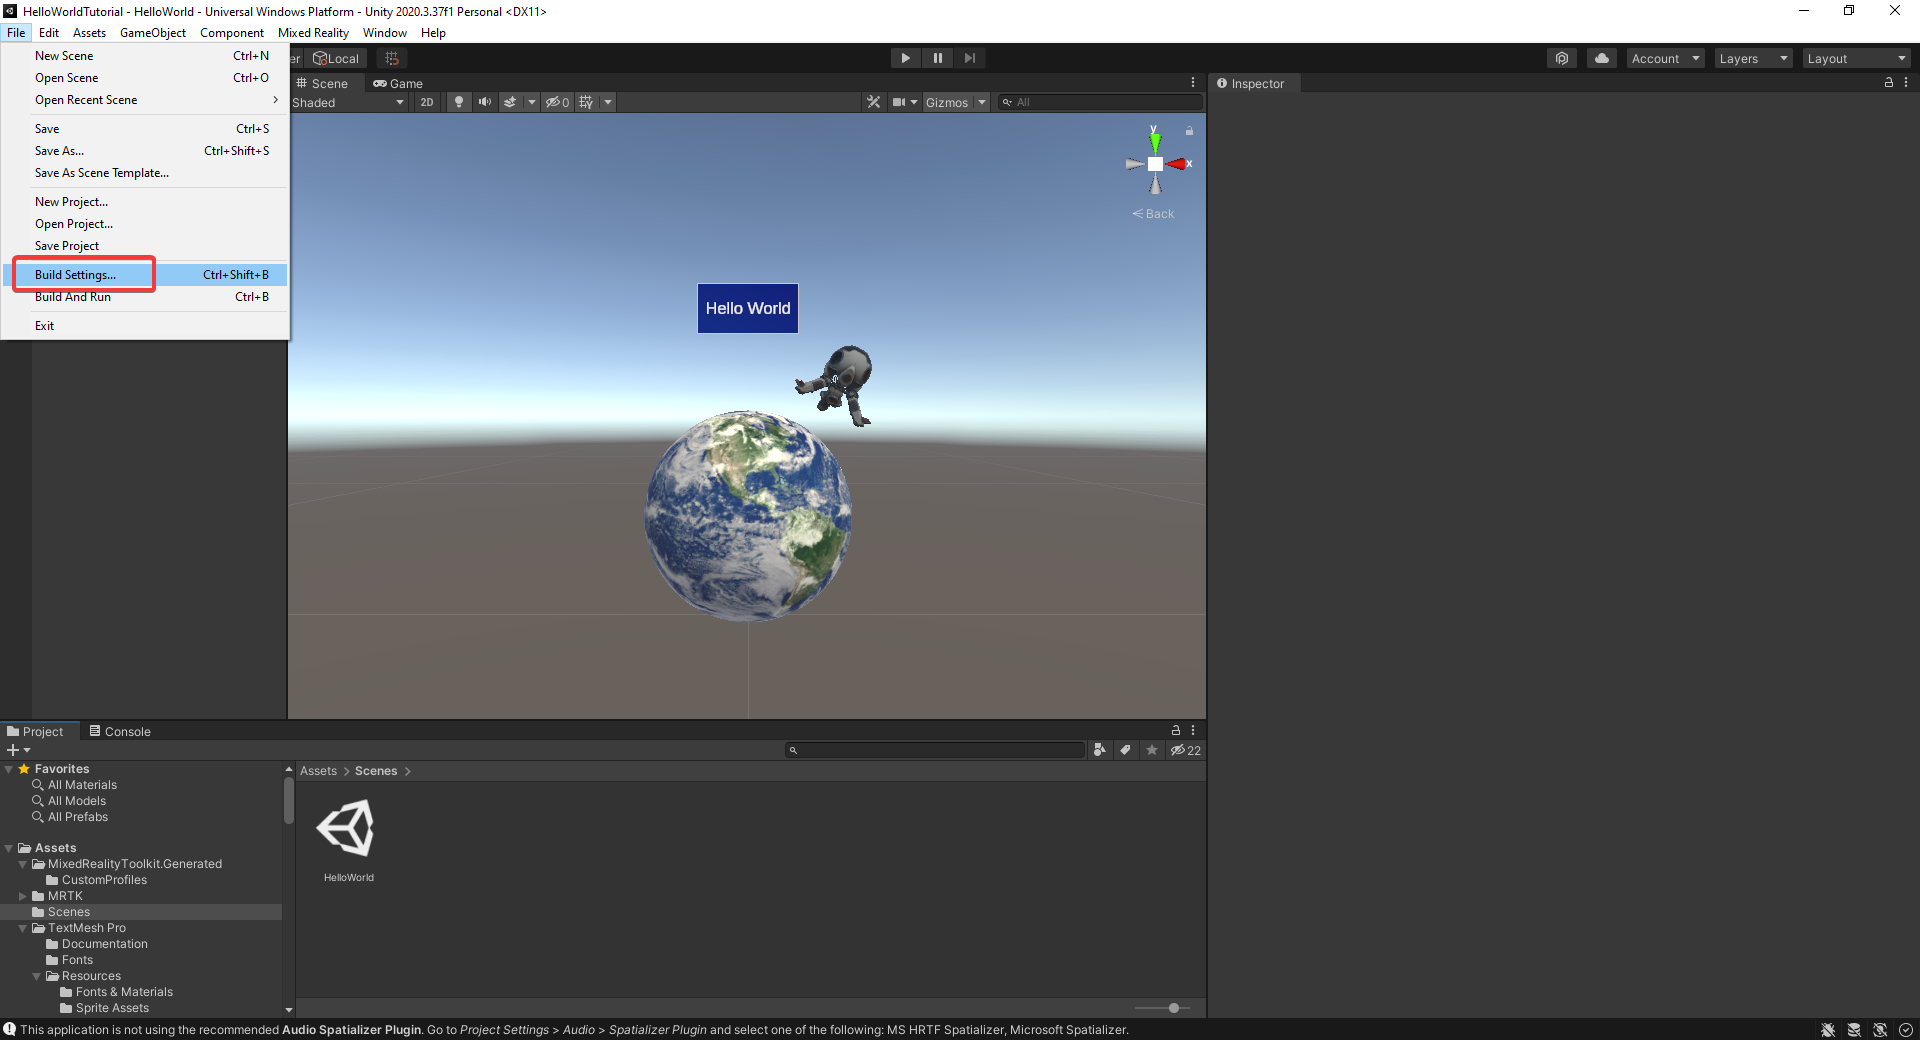
To build the app, navigate to File > Build Settings:
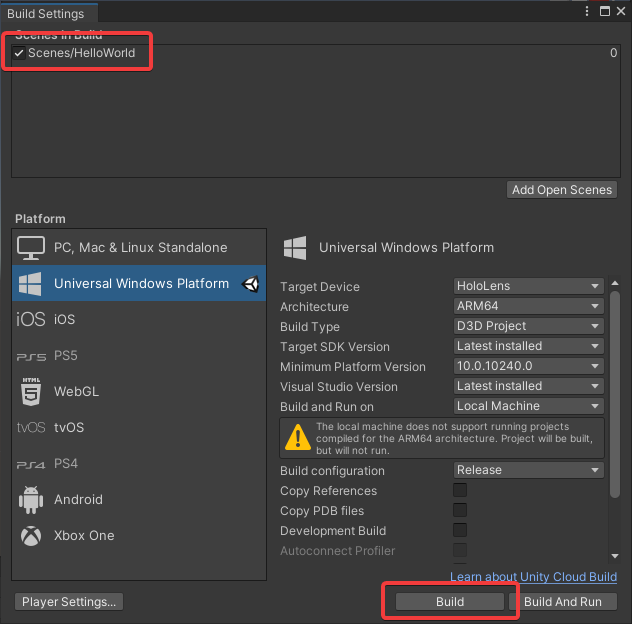
Before building the app, we need to add our HelloWorld scene to the build. To do so, click Add Open Scenes:

Once we’ve confirmed that the HelloWorld scene is listed under the Scenes in Build List, we can build the app by clicking the Build button:
Unity will prompt you to choose a location for the build. Personally, I like to create a Build folder in my Unity project directory:

Wait for Unity to finish the build, this may take some time. When the build is done, open up your build directory and confirm that there is a Visual Studio solution (.sln) file present:

Step 4: Deploy the App to the HoloLens
Open and Configure the Visual Studio Solution
Open the HelloWorldTutorial.sln file with Visual Studio:
First we need to change the configuration to Release and the platform to ARM64:

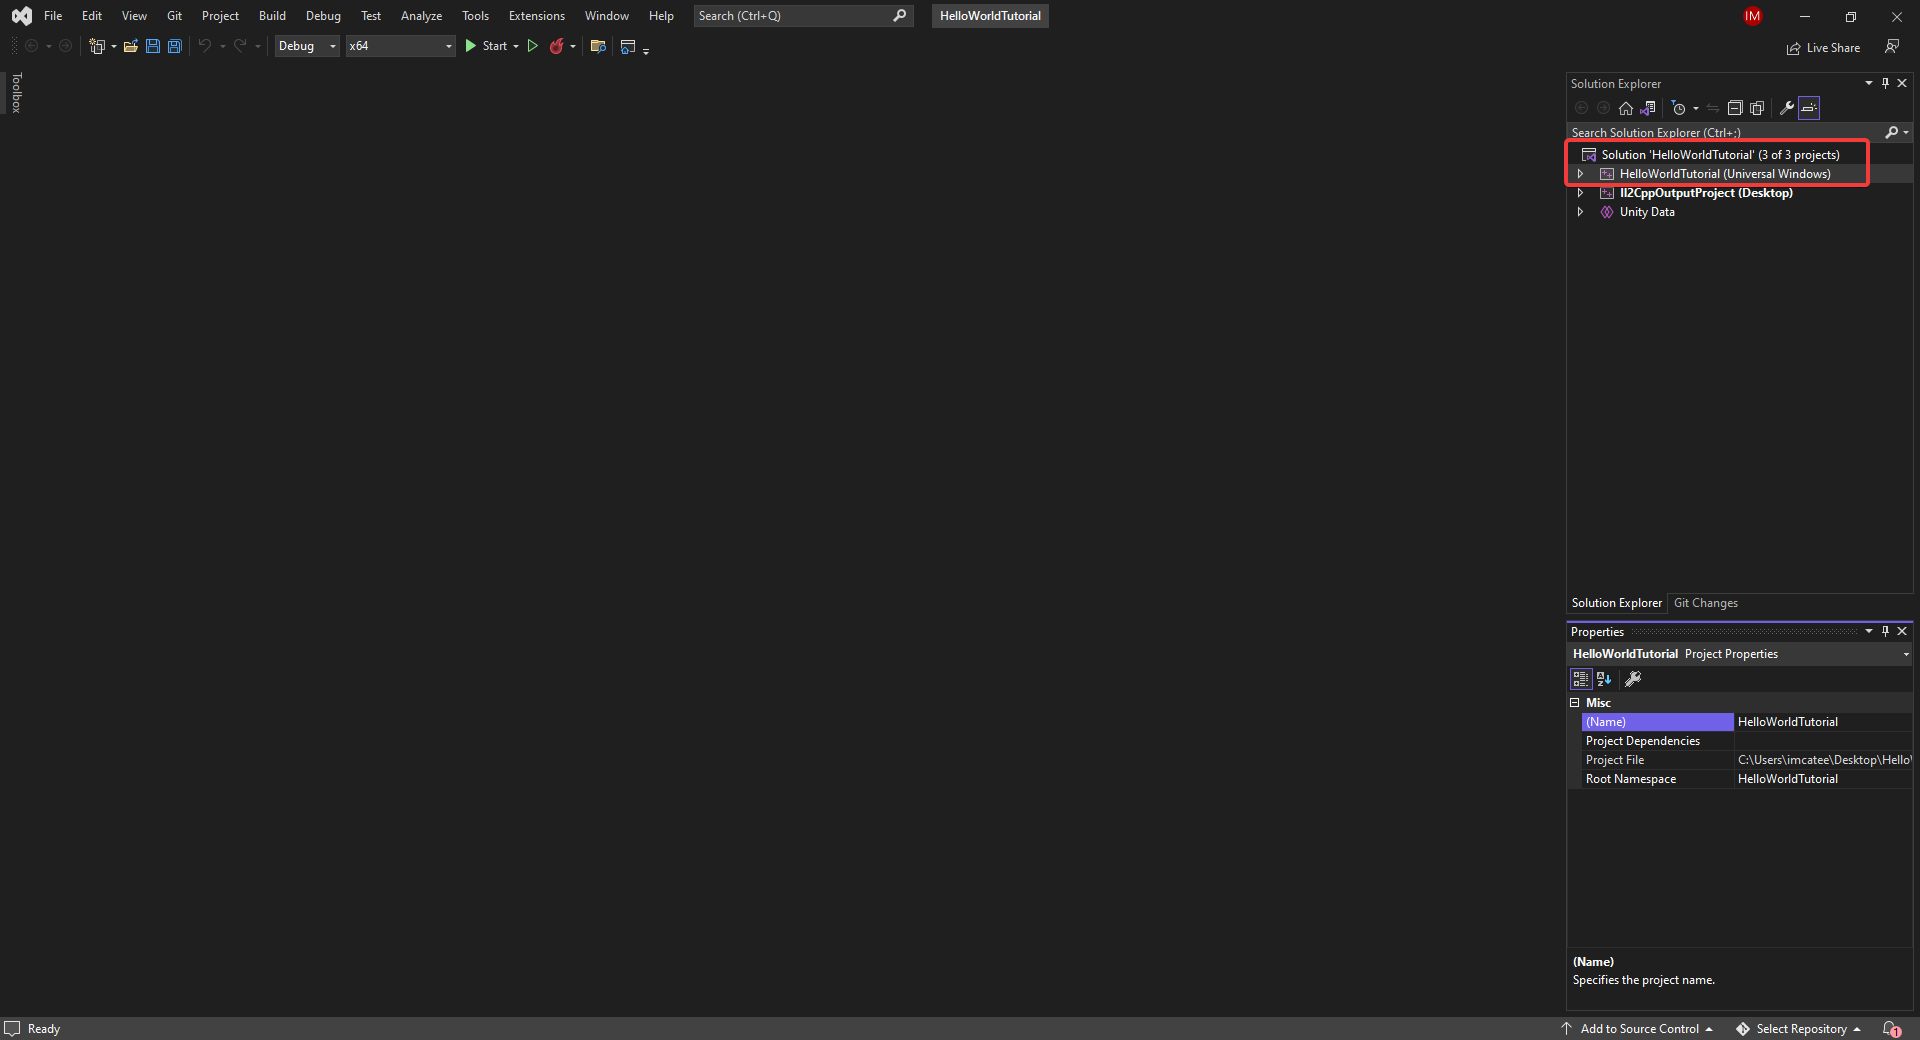
You may also need to change to the startup project to HelloWorldTutorial (Universal Windows). In the Solution Explorer, check if the HelloWorldTutorial (universal Windows) is bold as shown:

If it is not, right click on the HelloWorldTutorial (Universal Windows) project and select Set as Startup Project:

We are now ready to actually deploy the app to the HoloLens. One can either do this over WiFi or by connecting the HoloLens via USB. Personally, I prefer to deploy over WiFi, but guides for both methods are presented below.
Deploy Via WiFi
To deploy over WiFi, we need the IP address of the HoloLens. One of the easiest ways to find this is to simply put on your HoloLens and say “What is my IP address?”. A Dialog will pop up with your device’s IP:

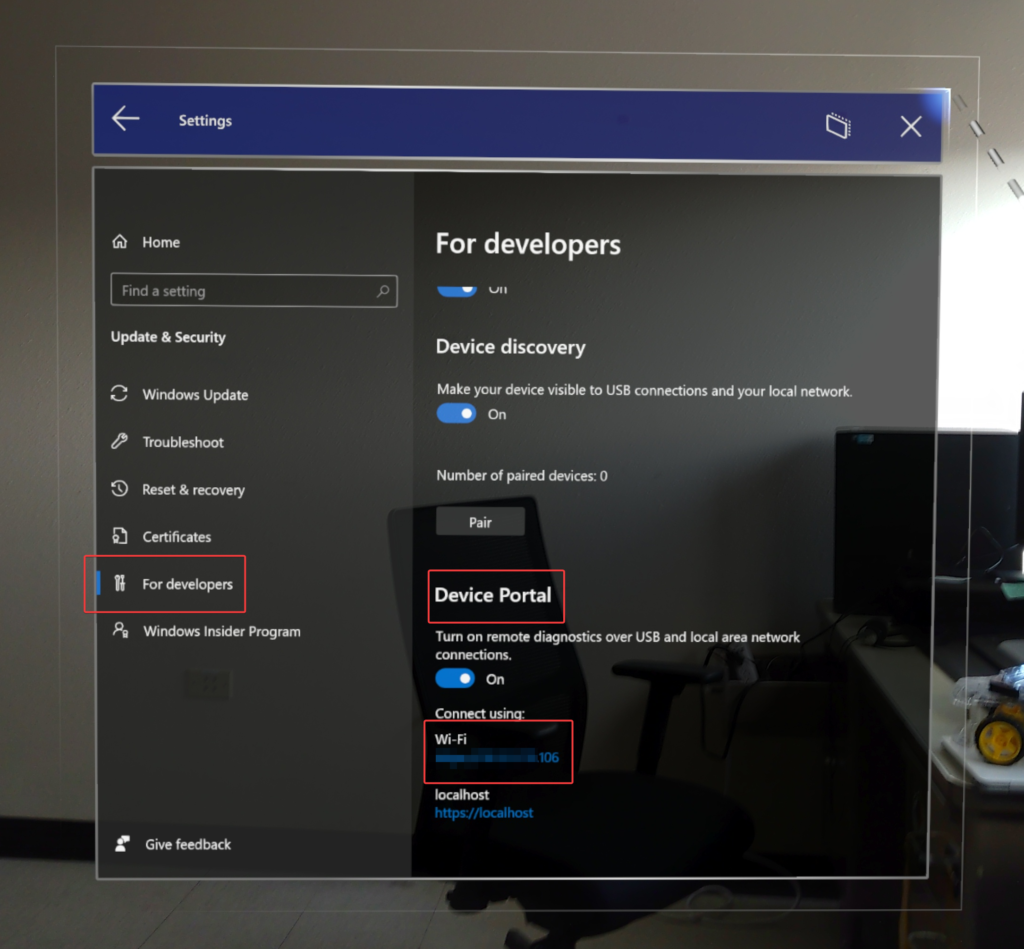
Alternatively, you can always find your IP by opening up the Settings app on the HoloLens and navigating to Update & Security > For developers, and the IP address is listed in the Device Portal section under Connect Using Wifi:
Now return to Visual Studio, and ensure that the target is set to Remote Machine and click on the HelloWorldTutorial Debug Properties to enter the Property Pages:


In the Property Pages menu, on the side, navigate to the Debugging properties found at Configuration Properties > Debugging. In the Machine Name property field, enter the IP address of your HoloLens (you do not need to prefix the IP address with http://). Also, ensure that the Authentication Type is set to Universal (Unencrypted Protocol, then click Apply and OK:

Now to deploy the app, ensure your HoloLens is on and click the Start Without Debugging button or press Ctrl + F5:

The deployment process may take some time to complete.
If this is your first time deploying to the HoloLens, you may have to pair the HoloLens with your computer. Visual studio will prompt you for a pairing code:

You can find this code on your HoloLens by opening the Settings app and navigating to Update & Security > For developers, and clicking the Pair button under the Device Discovery options:


Once Visual Studio has finished deploying the app, it should automatically open on the HoloLens.
Deploy Via USB
To deploy via USB, turn on your HoloLens and connect the USB-C cable between the HoloLens and your computer. In Visual Studio, switch the deploy target to Device:

Ensure your HoloLens is on and click the Start Without Debugging button or press Ctrl + F5:

The deployment process may take some time to complete.
If this is your first time deploying to the HoloLens, you may have to pair the HoloLens with your computer. Visual studio will prompt you for a pairing code:

You can find this code on your HoloLens by opening the Settings app and navigating to Update & Security > For developers, and clicking the Pair button under the Device Discovery options:
Once Visual Studio has finished deploying the app, it should automatically open on the HoloLens.
Launch the App
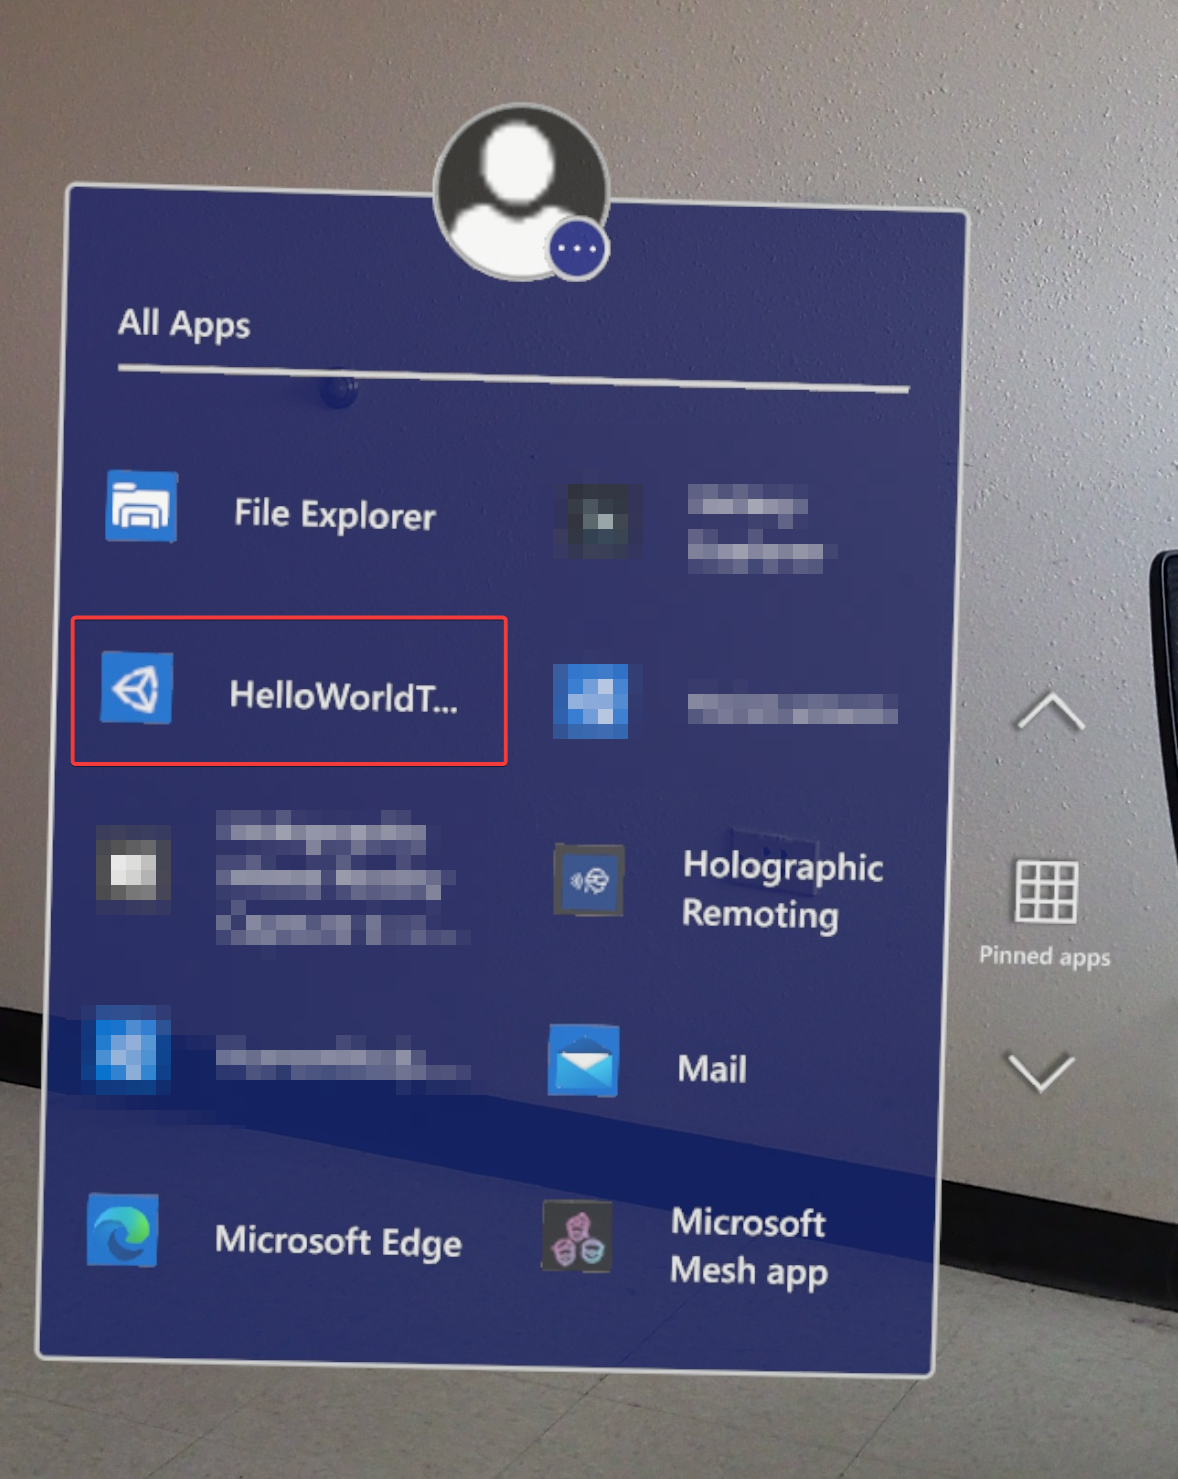
As mentioned, the app should automatically open when it is finished deploying. However, if it doesn’t or you need to reopen it, you can launch the app by navigating to All Apps > HelloWorldTutorial on your HoloLens:
Finally, enjoy all of your hard work. Reach out, grab and manipulate the objects in your Hello World scene:
Final Thoughts
If you’ve made it this far, I just want to say thank you for reading and following along. If you are having problems or have feedback/suggestions for me, feel free to leave a comment below.
I know this Hello World scene seems basic, but the development steps we went through here lay the groundwork for more advanced and interactive augmented reality experiences. I also know that developing for the HoloLens may seem like a daunting challenge. Even this beginner tutorial may come across as a laborious endeavor. However, I promise that it gets easier and more fun as you continue. Lastly, I truly believe that augmented reality technology has many current and future applications and being able to develop AR apps will be a critical and in-demand skill.
Until next time,
Ian McAtee